Behind the scenes
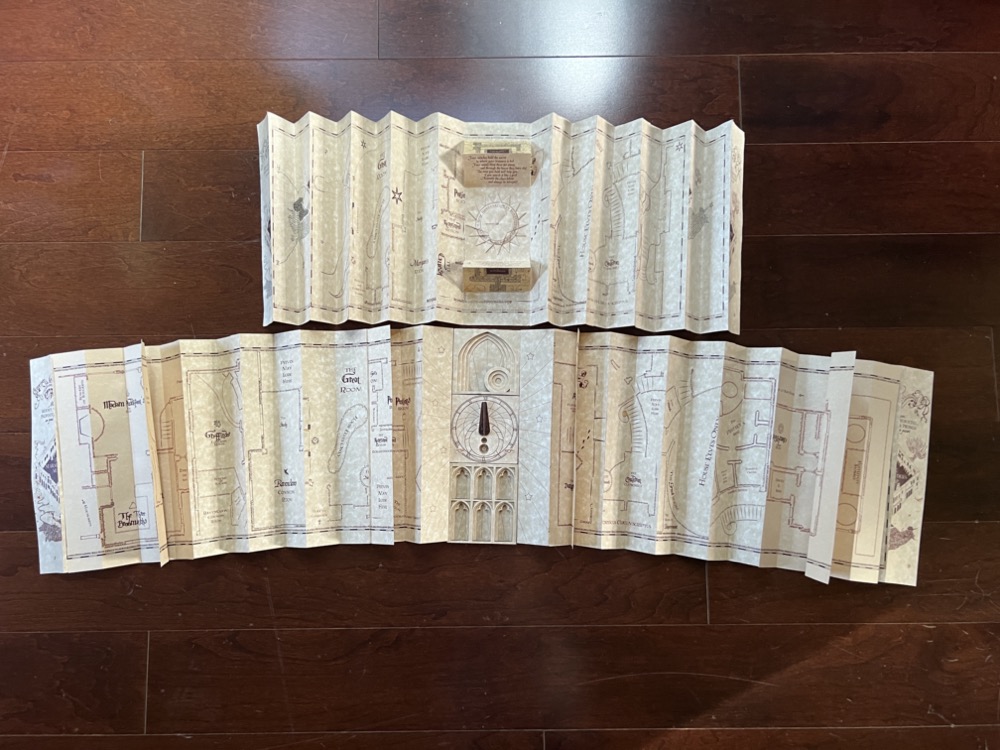
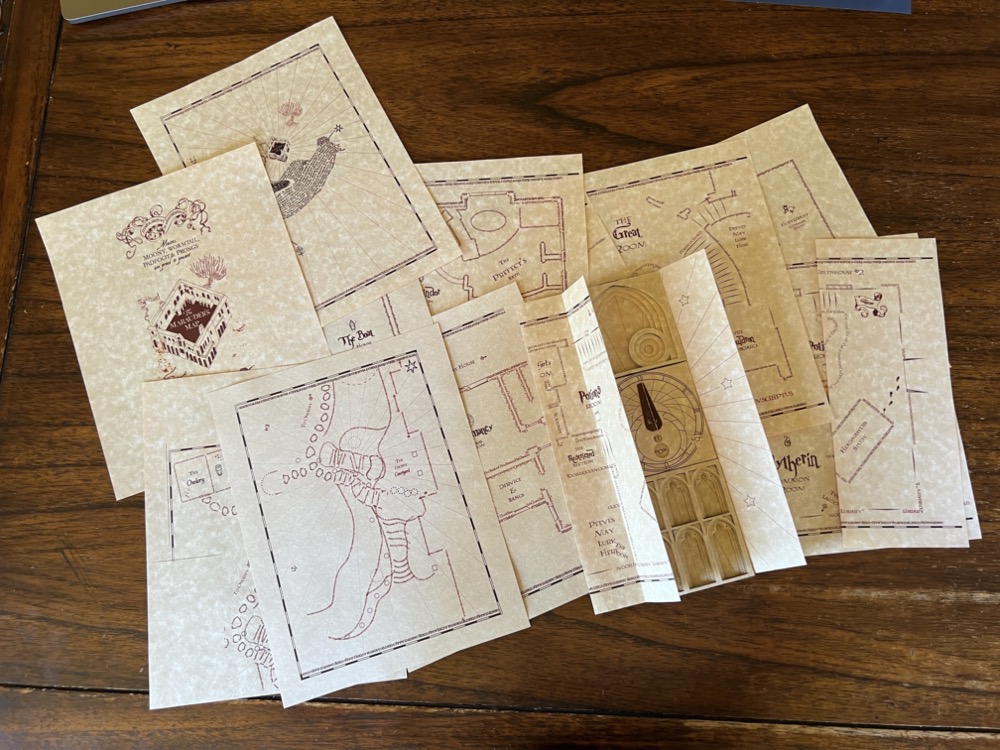
The Marauder’s map for the 2013 scavenger hunt has been the gold standard up until now. With this version, I looked to double the number of pages as well as adding pullout sections. Below is a photograph of the original 2013 map compared with this years.
My original inspiration was to make a paper lock, representing the Clock tower, with holes in the front of the clock that would allow you to see the dials of the lock. On the dials would be icons that would line up with the holes and–somehow–indicate where on the map you should next look. The challenge was how to make a paper combination lock flat enough to be the bottom page of the Marauder’s map. I found few examples of cardboard combination locks but these were far too thick.
Contents
Designing the Combination Clock
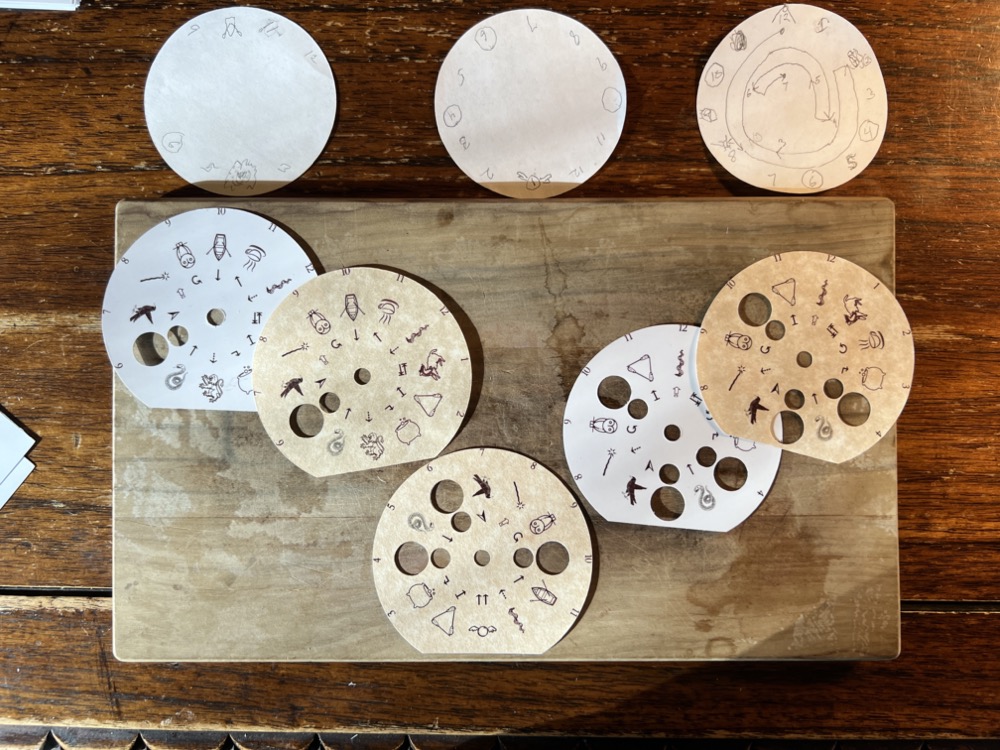
The Clock wheel pack with initial prototypes above.
Background on Traditional Rotary Combination Locks

Traditional rotary combination locks work by having a number of disks or wheels free-floating on a spindle. Each wheel has a notch (called the gate), that when lined up allows a metal bar (called the “fence”) to move into the gate, allowing you to open the shackle.
Each wheel has a small nub on the front and back. When the nub or pin on one side of the wheel (called the “drive pin”) comes in contact with the nub on the next disk (called the “wheel fly”), it “picks up” that wheel and carries it along. This is why you are told to spin the dial on a typical three number combination locks clockwise two times past zero and then to your first number. This will “pick up” all three wheels and bring them back to their starting position, then on to the first number. As you reverse and spin the dial counter-clockwise, you will leave that first wheel in its ‘solved’ position. Once you get to the second number, you reverse direction again, leaving this second wheel in its solved position. The final turn is the fixed solved position and lines up all the gates.
(For a more in-depth discussion of combination locks, see HowStuffWorks Inside a Combination Lock and How Combination Locks work.)
The Paper Version
Initial prototypes revealed that a little paper nub was too fragile and prone to missing, so I came up with two concentric wheels, one that would be glued to the front of each wheel, the other to the corresponding back.
I mocked up the wheels on paper to figure out what combination numbers would work well to allow me to have holes in each wheel to reveal icons on wheels (and the base) below.
Initially, I had thought trying to incorporate a fence and system of gates would be too difficult with the low tolerance of the paper wheels but came up with the happy thought of shaving the bottom of each wheel off, allowing a “bolt” to act as the fence.
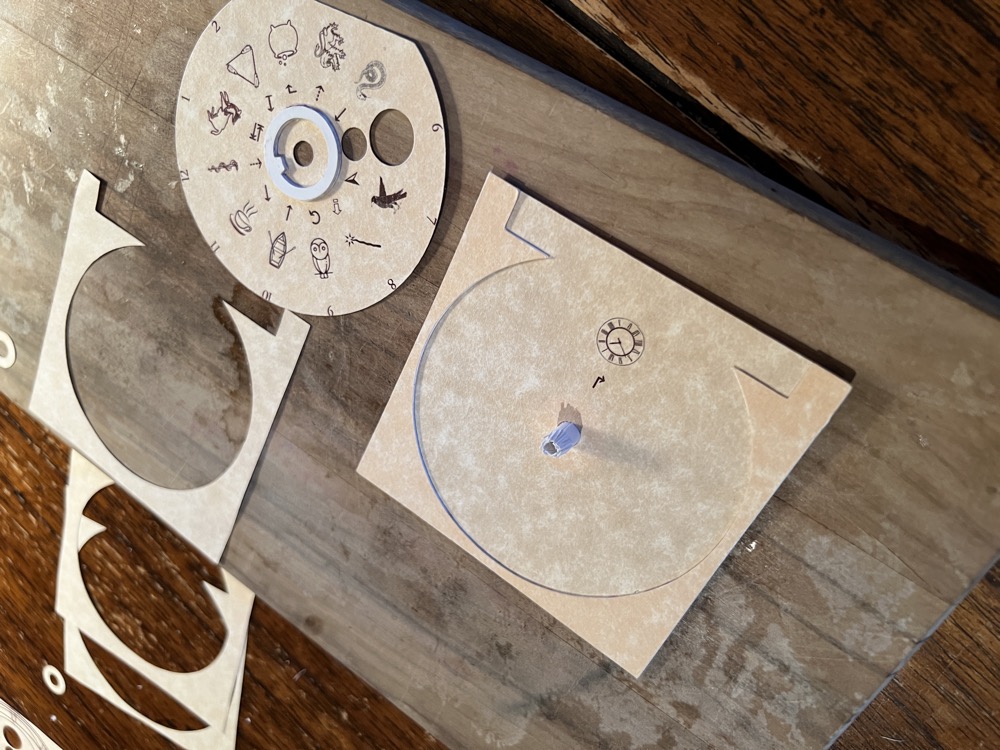
To the left is the base of the clock, to the right is the back wheel. Note the white fly wheel glued in place. Above the wheel are spacers to allow the wheel to have room to move without touching the other wheels. These were glued into a stack for each wheel. Below is the wheel in its starting position, revealing the clock icon on the base plate (for the first clue). The bottom notch is where the fence will slide, once all the wheels are lined up correctly.
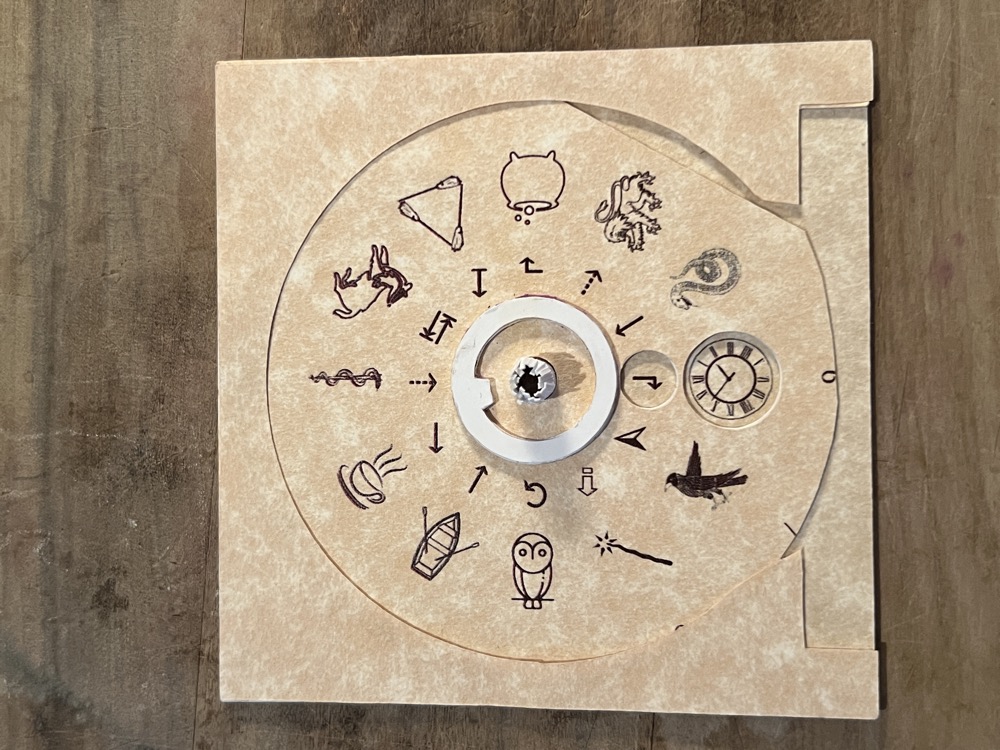
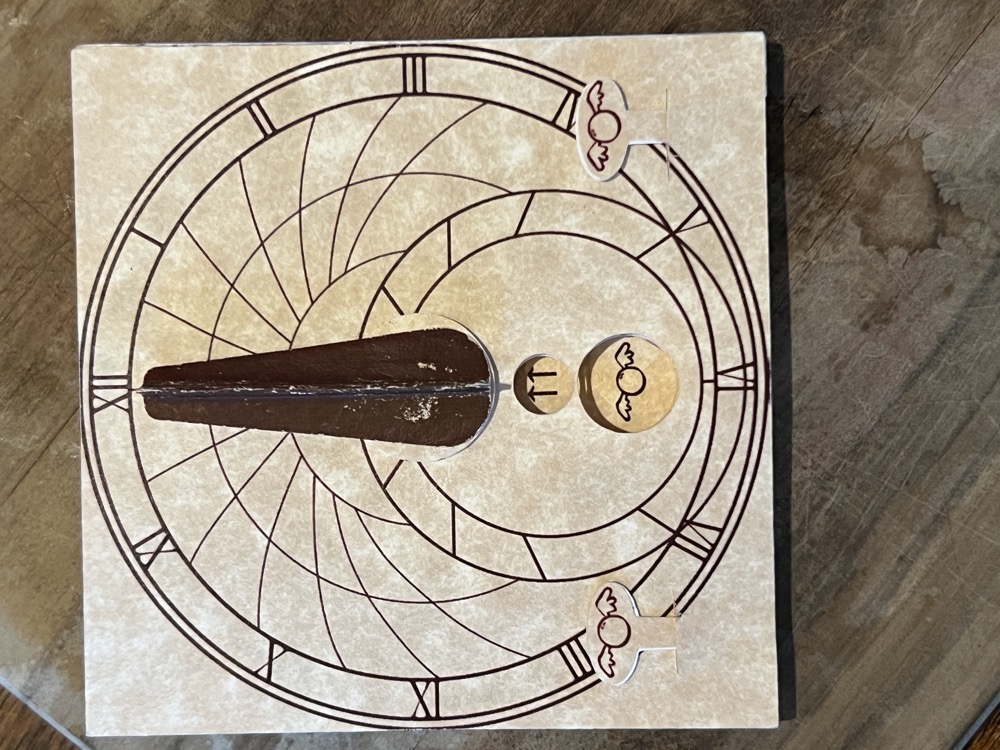
Rotated to the ‘solved’ position:
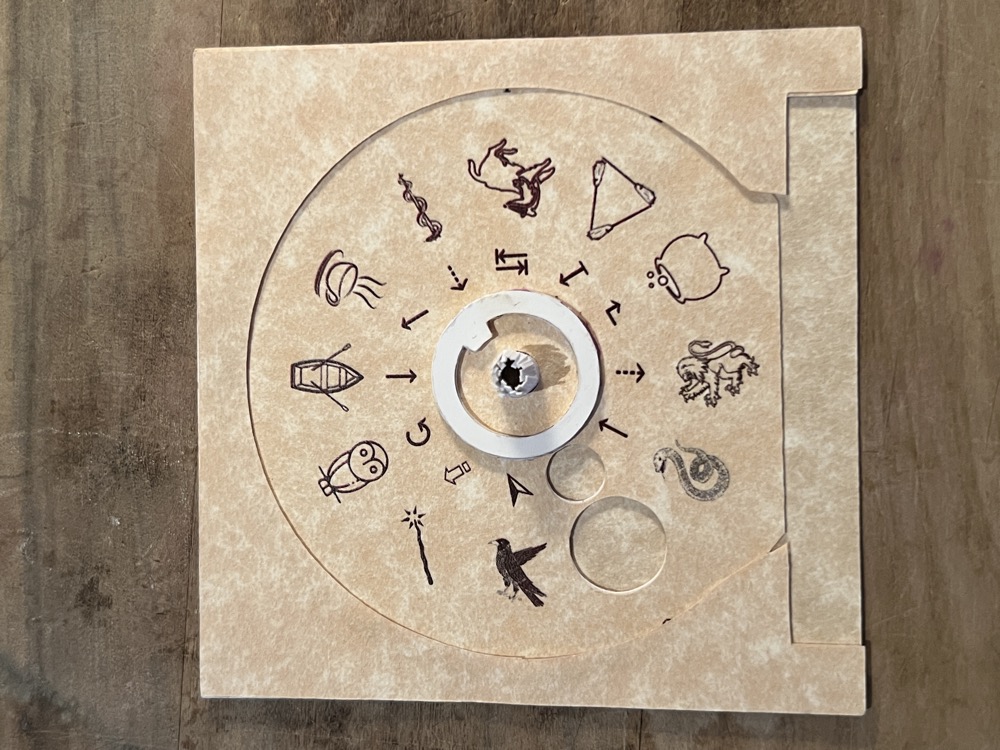
Here are the three dials in their starting position:
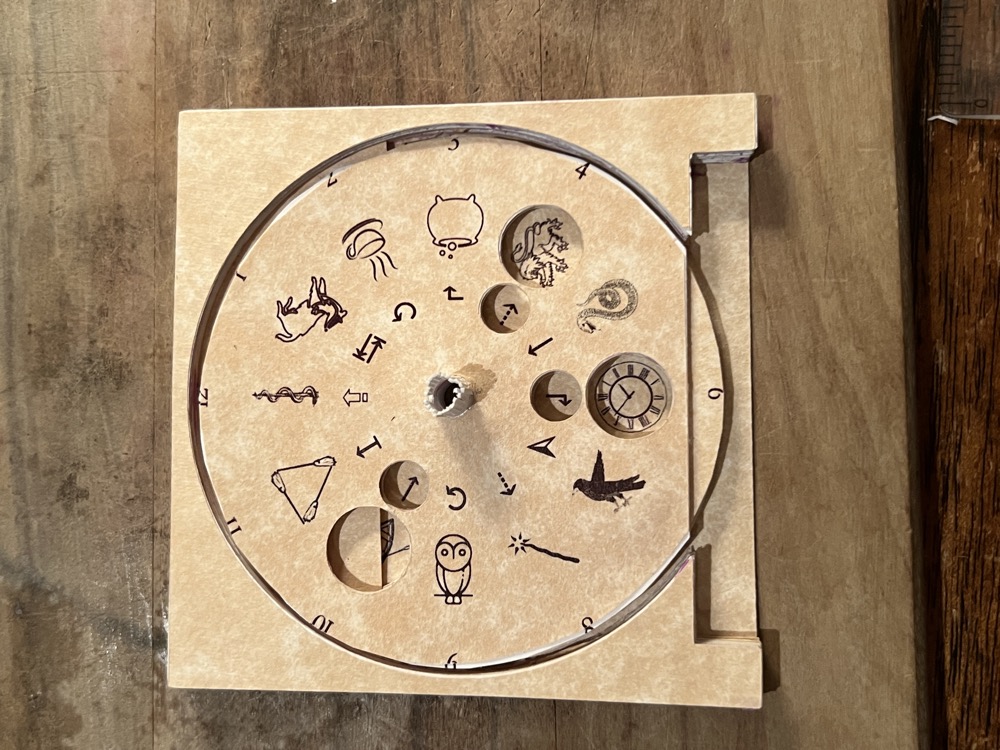
With the face on and the fence inserted. Below the clock, you can see an initial prototype of the fence. In the starting position, the fence is blocked from moving up, leaving a tab below that prevents the clock from swinging open.
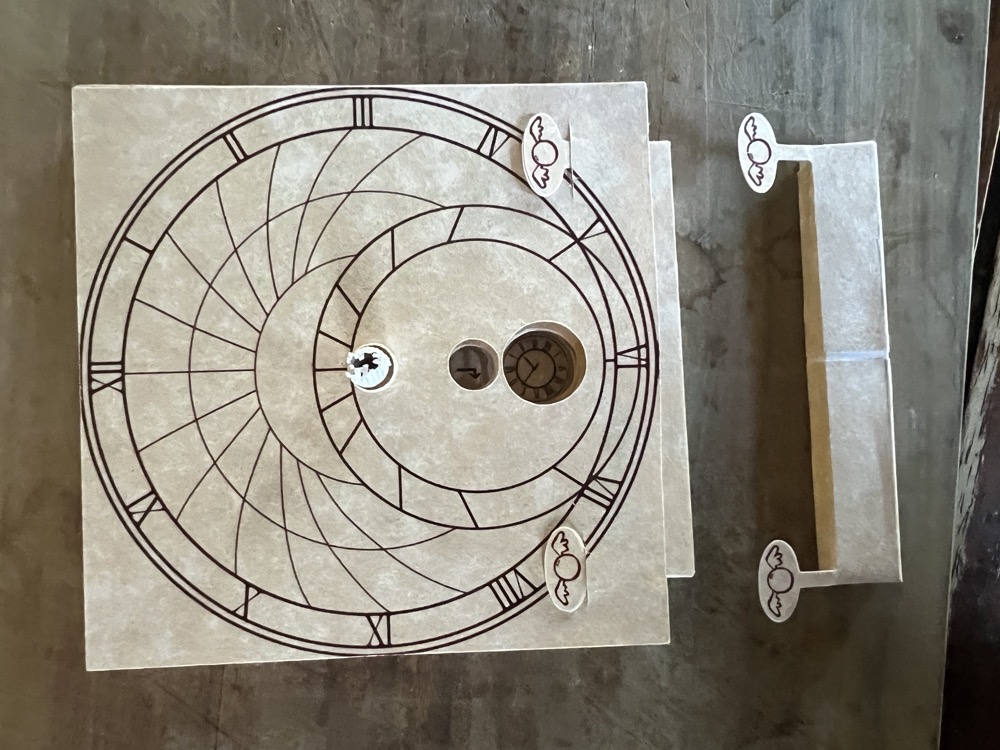
Once ‘solved’, the snitches can be pulled up, unlocking the clock.
There were a number of mis-steps here, even with making many diagrams of how the thing should be assembled:
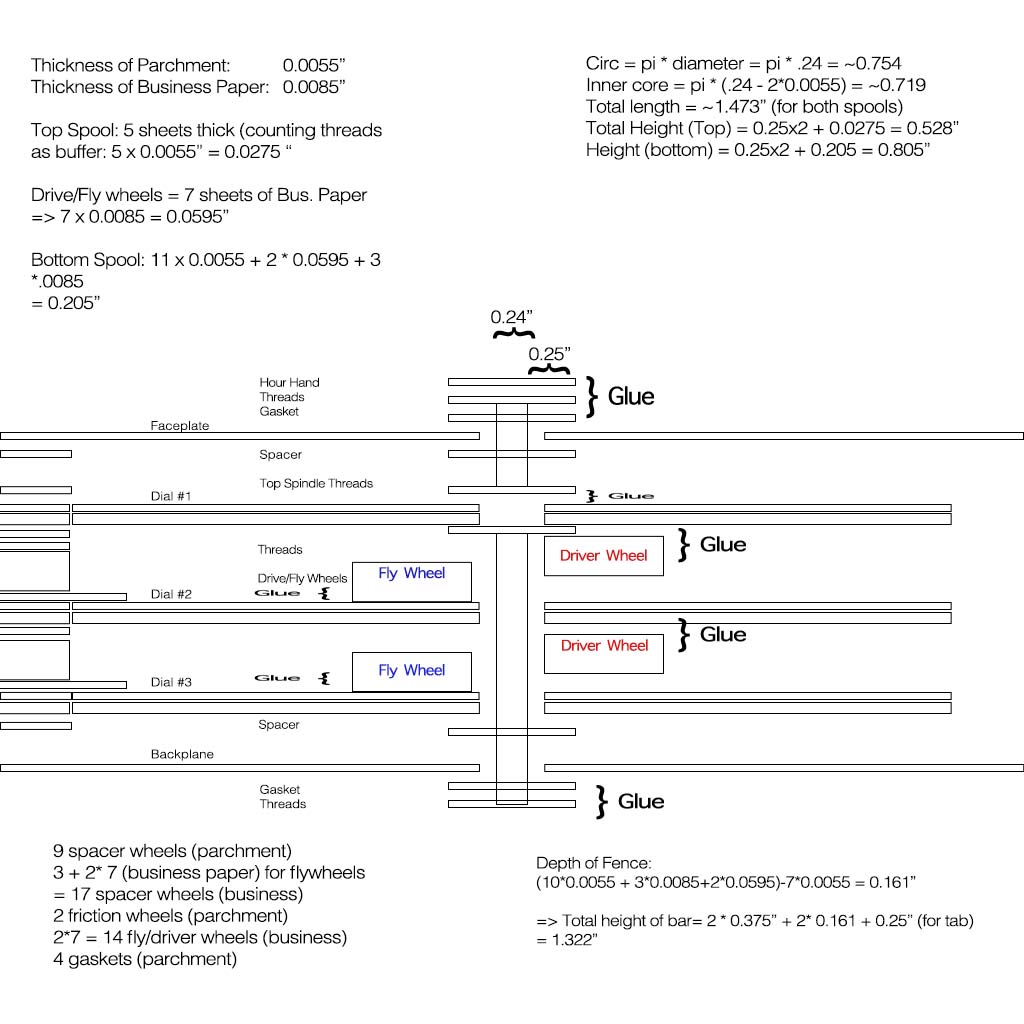
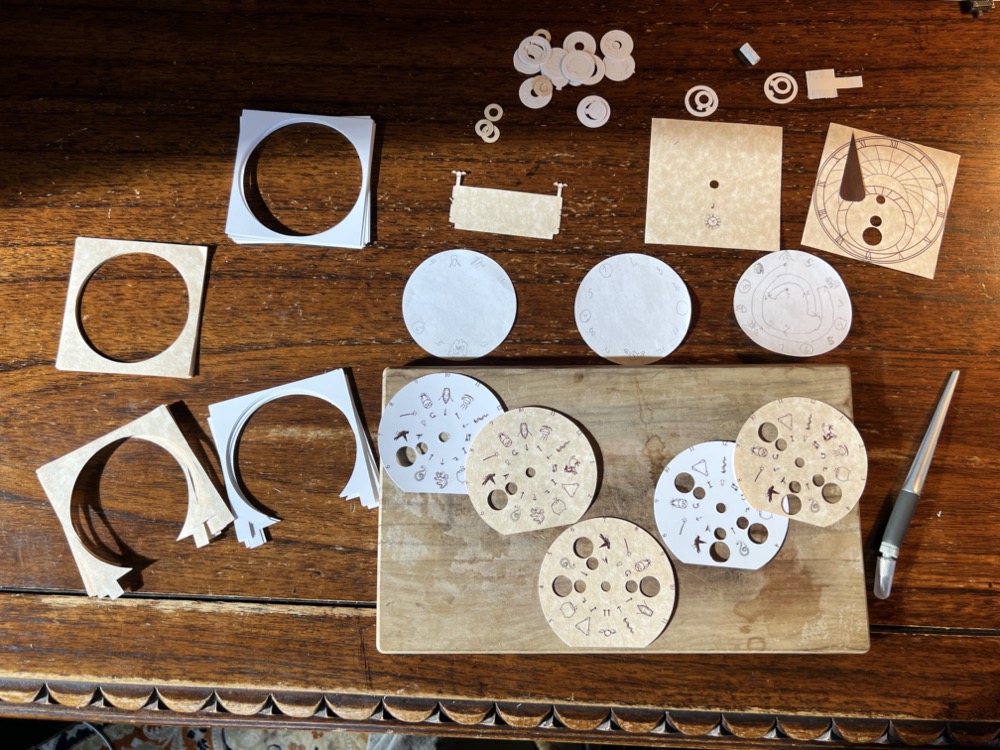
Here is a photograph of all of the clock parts, waiting for assembly.
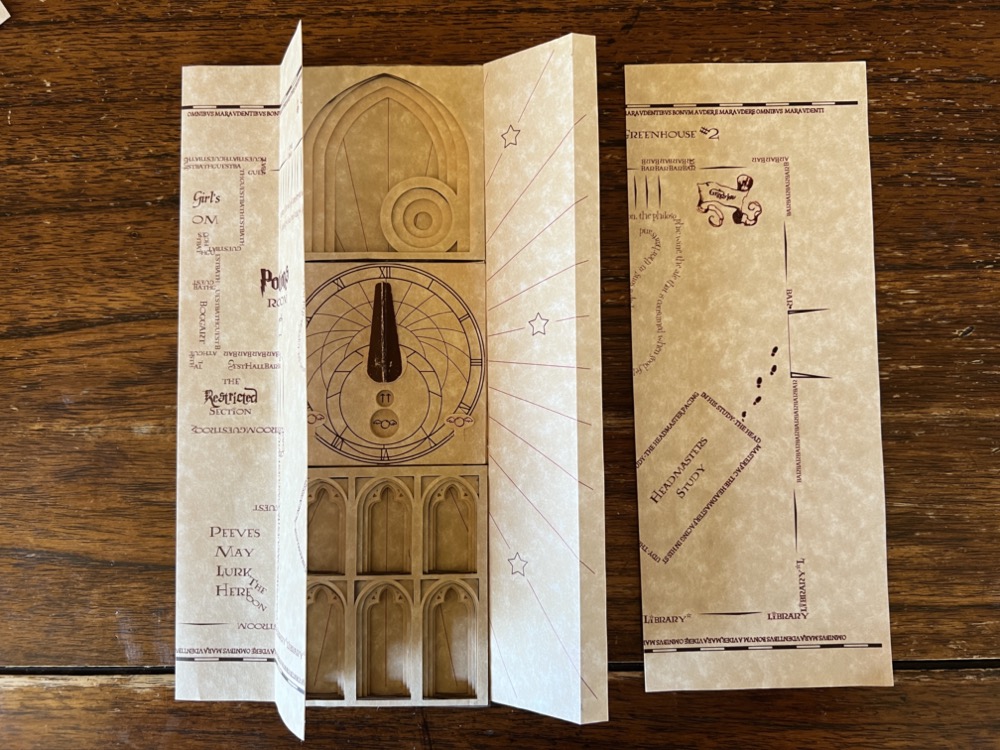
Making the Map
To make the map, you take a standard 8.5” x 11” sheet of paper and draw two lines 2.5” from the left and right. Fold each half on that line and the center will be 3.5” wide. Fold each flap so that the edges meet and you will now have a 3/4” flap that you can glue the next page to. Cut each of the pages in half and repeat for as many pages as you like. The cover is a page with the flaps removed.
In the photograph below, you can see the left side of the Potions page has been glued in with the right side still to be glued.
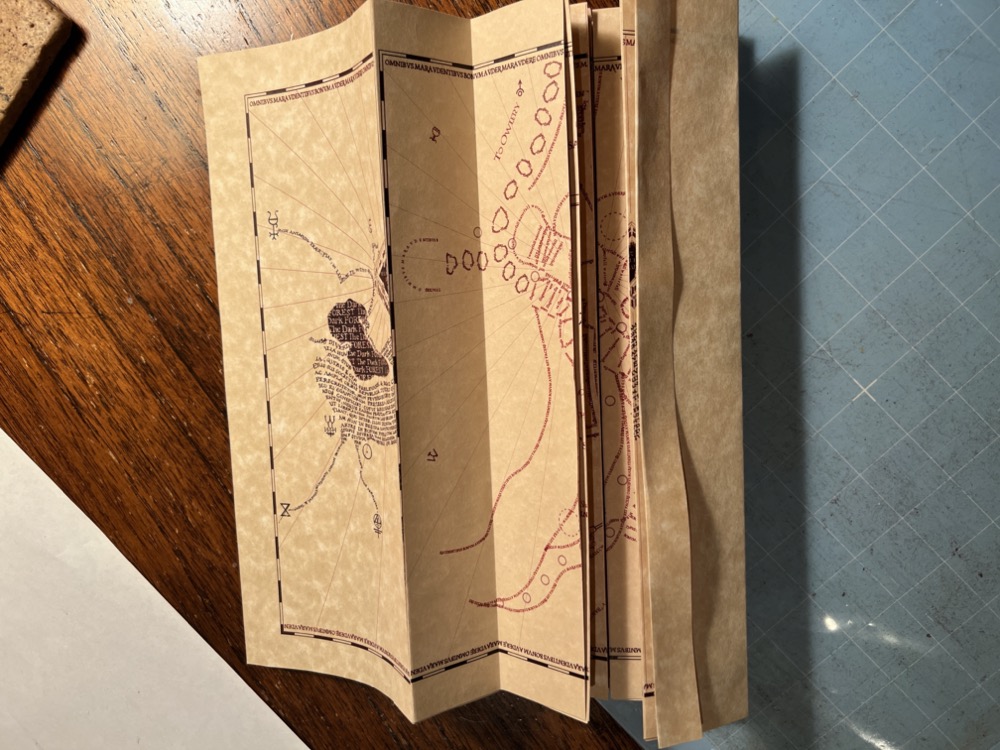
Once you have the back most page done, use the edges to measure the remaining folds.
Below is the map ready for the final cover to be glued on. The left side (the grounds page) hasn’t been folded yet but you can see the 3/4” flap where the cover will go on the right.
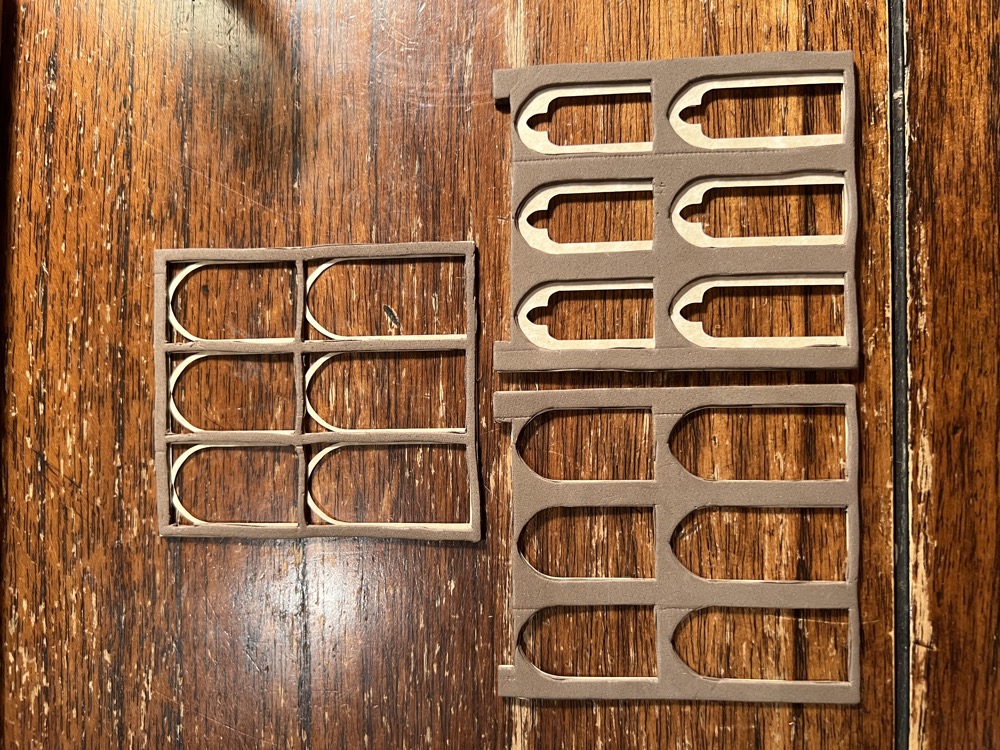
For the clock itself, I came up with a design loosely based on the movie. It had four layered cutouts to make the tracery of the clock tower itself.
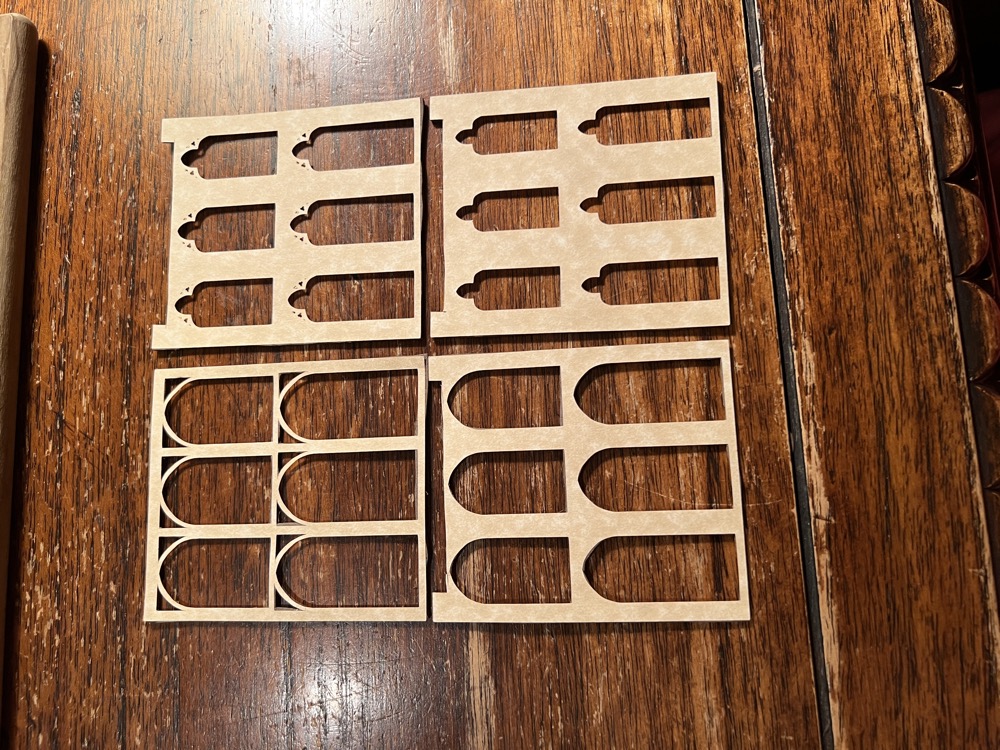
You can see the lower sections needed to have cut-outs on the top for the fence to descend into to hold the clock in place. I forgot to add that to the first sections and so needed to cut those by hand! (The others were done on my Cricut.)
I used some foam backing I already had to thicken the sections, both to keep the weight down and to avoid all the extra gluing!
The Clues
The final form of the origami clock clues is the third iteration. My first idea was to make a miniature version of Robert Lang’s Black Forest Cuckoo Clock. He has the diagrams for folding this in his Origami Design Secrets but after finally figuring out how to adapt this, I realized it was a) far too much work to do seven times and b) it was also going to be very challenging to unfold. I came up with a simpler version but it also was going to be challenging to unfold (the hands of the clock really crimp the paper).
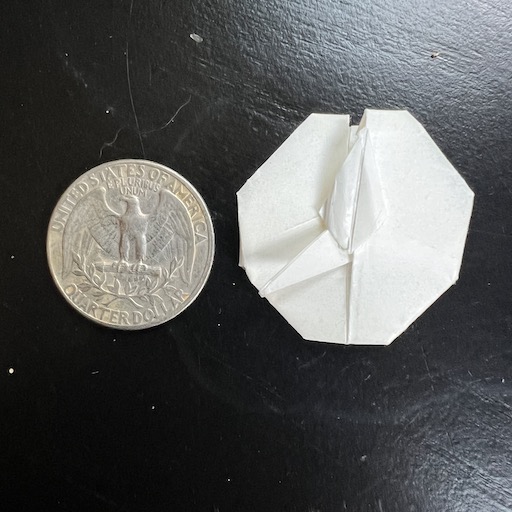
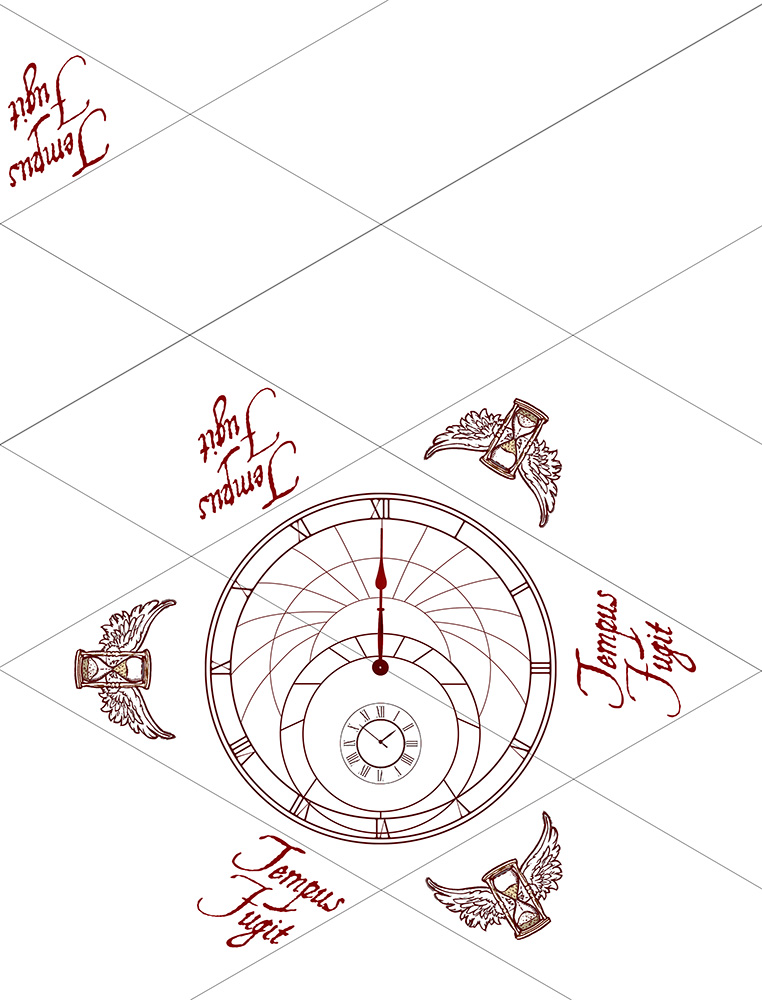
I almost given up when I thought of just printing the clock on a hexagonal fold. This comes from a fold called the Hexagonal Incense Packet, first seen in print in 1878.
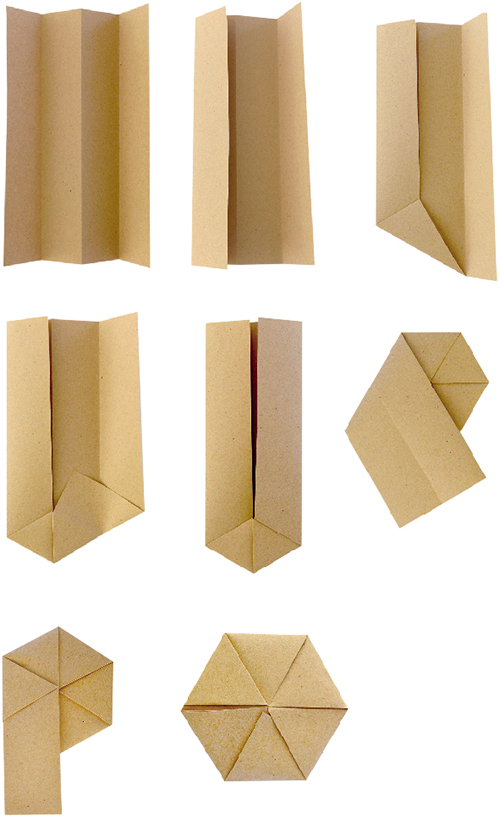
Aside from being easy to fold and unfold, it allowed me to print the specific icon of the clue with the time on the front. Due to the way it is folded, I could also add a common back to fit the clock theme. I sized the paper so that I could fit four on a US standard 8.5” x 11” piece of paper and did the layout in Photoshop.