2024 - Clocktower Christmas
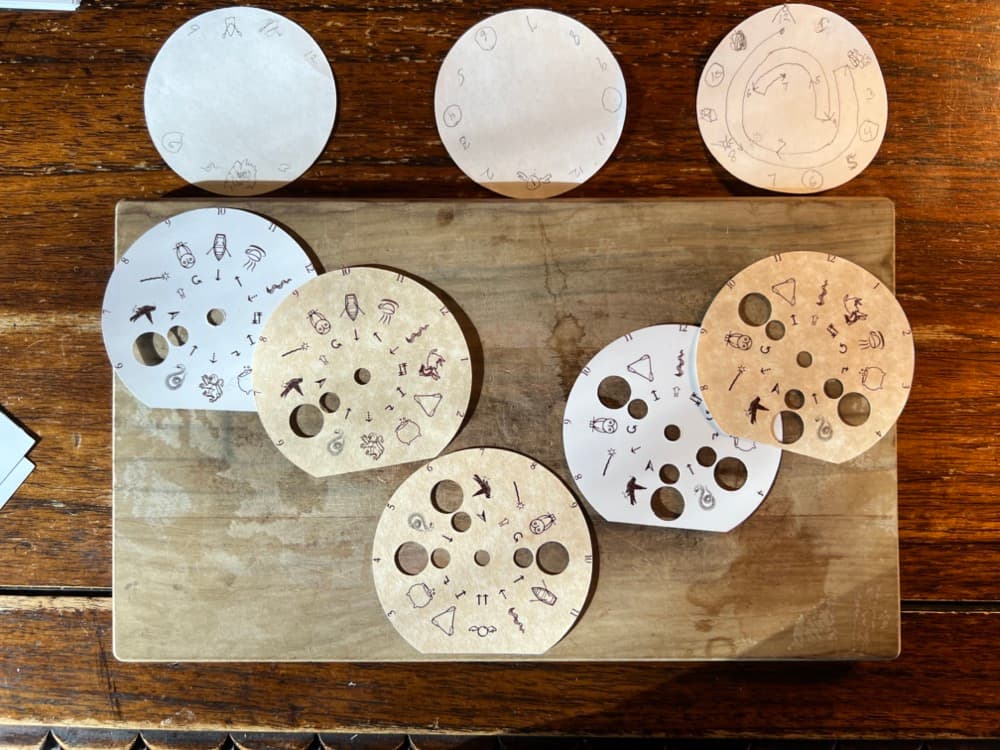
Almost immediately after finishing Tralawny’s Tarot, I came up with the idea of doing a clock-based scavenger hunt, where I would do an extended version of the Marauder’s map, with all the areas of the house mapped out and the center mechanic replaced with a paper clock that would represent the Clock Tower - but the clock would be a combination clock and show different icons for the clues.
This took a bit longer to make…
When you open the box, you find a sealed letter…
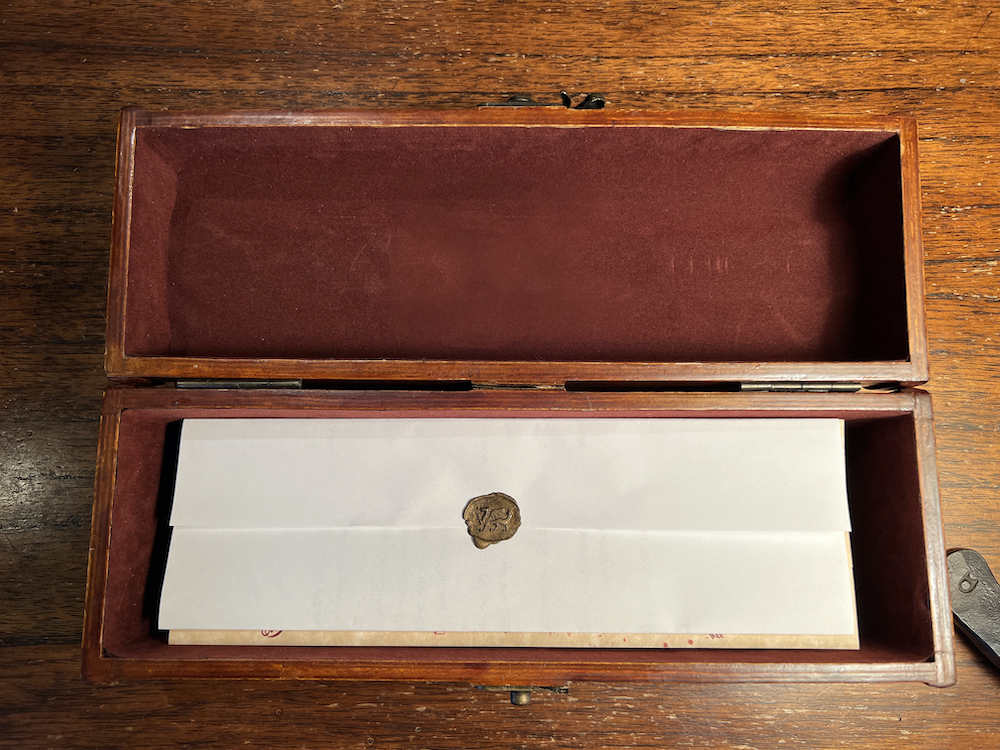
Breaking the seal reveals it is a letter from Hermione…

The letter reads…
Dearest Morgan,
If you find this letter instead of your gift, I’m afraid that something has gone quite wrong and I must ask you for your assistance once again.
Harry, Ron and I have had to go back in time to search for something, but as I no longer have the time turner, I’ve charmed the clock in the clocktower with the same spell. I’ve also created a clock tower in the Marauder’s Map and synchronized them.
If we get stuck, I should be able to triangulate our way back if you follow our path through time exactly.
If not, the consequences are too ghastly to discuss.
We have set our first destination in time to Midnight. I hope we will see each other again!
My most heartfelt thanks,
Hermione
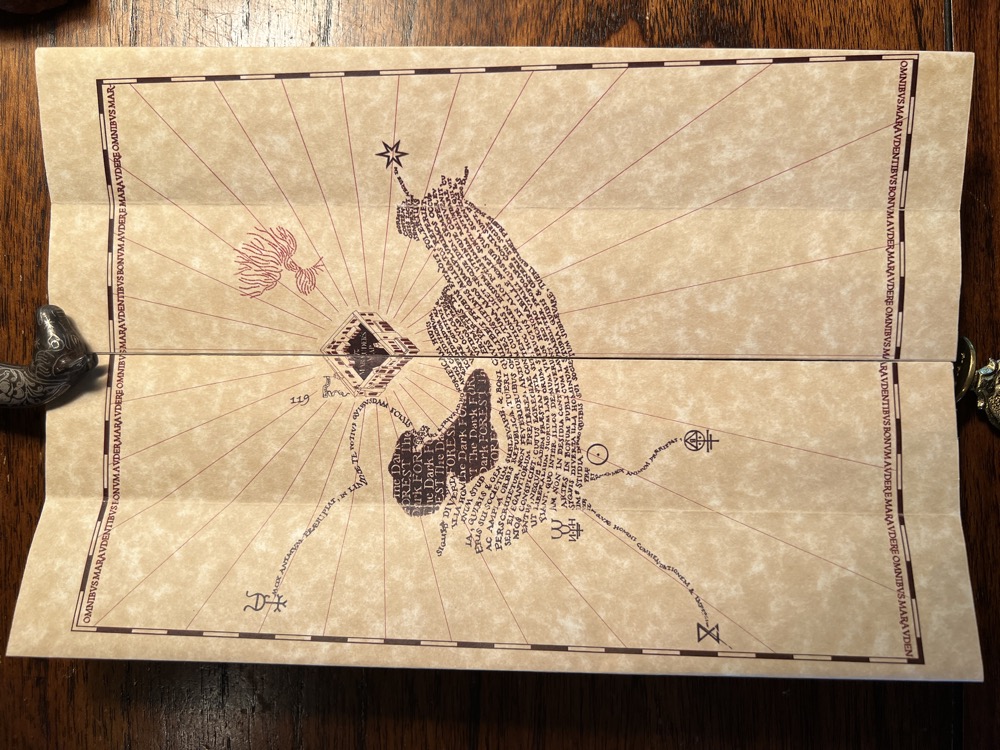
Underneath the letter is a Marauder’s Map of our house…

This appears very like the other Marauder’s map, with the next page showing the grounds, with our house, her tree house and the Brione’s forest…
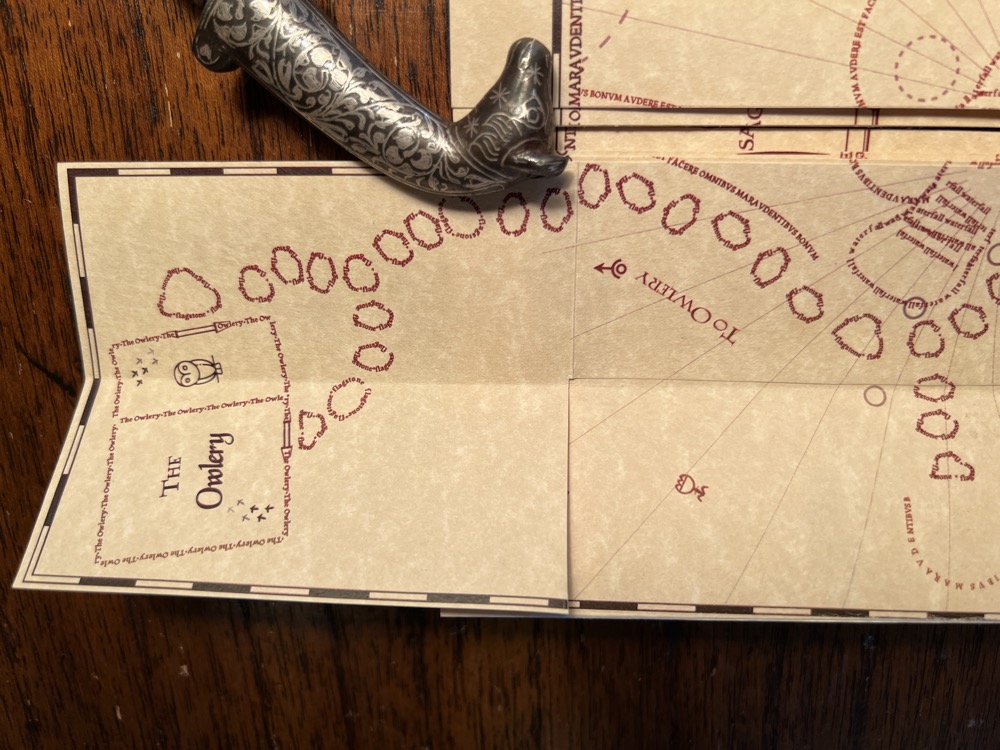
The next page is a bit different from previous years as the front garden now has a new flap in the top left with the text ‘To Owlery’…
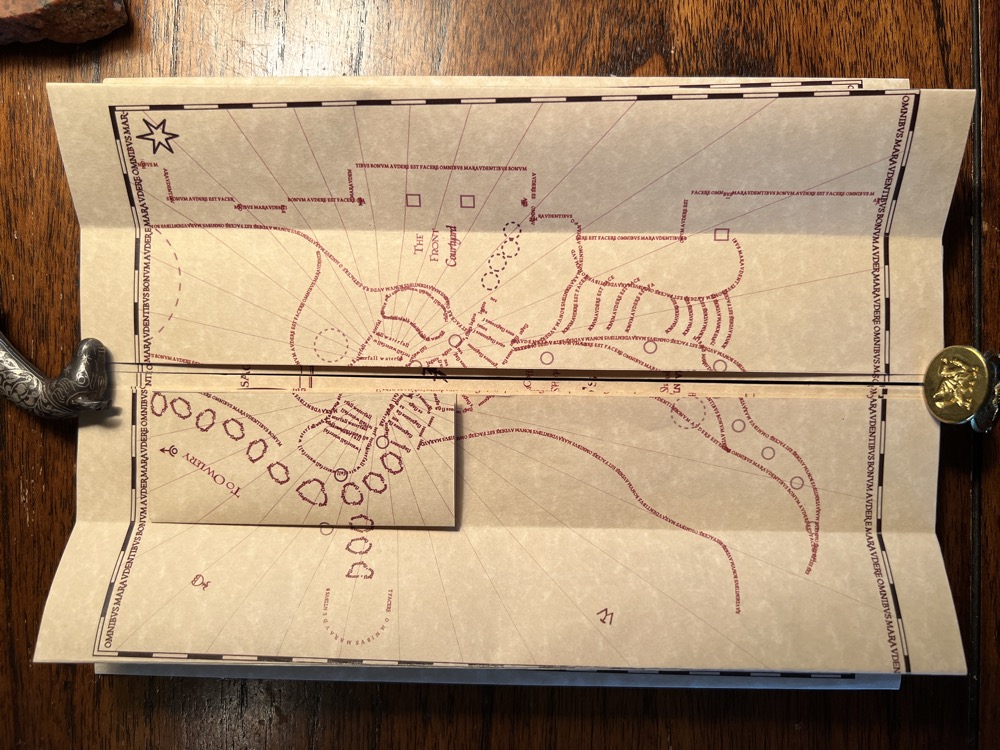
Unfolding the flap reveals a new part of the Garden, our chicken coop as the Owlery…
Another departure is that unfolding this section works a bit different, revealing a double wide spread with places from Hogsmeade - the village next to Hogwarts. Part of the puzzle here is to figure out that this is Sharlee’s side of the house and the garage. (This proved a bit more challenging than I thought.)
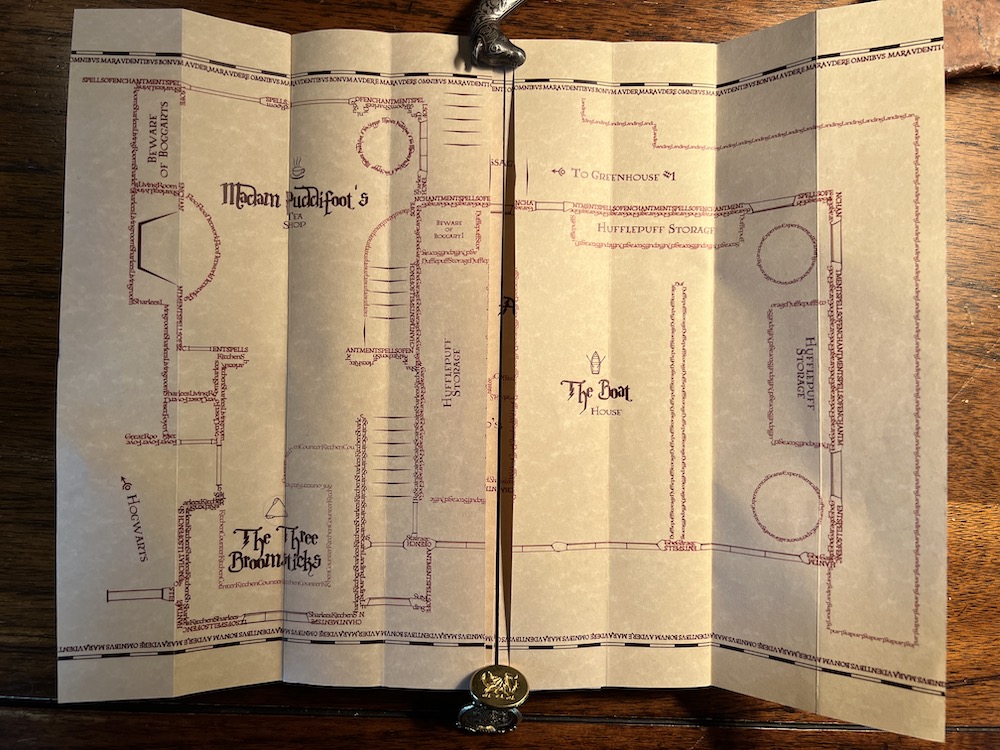
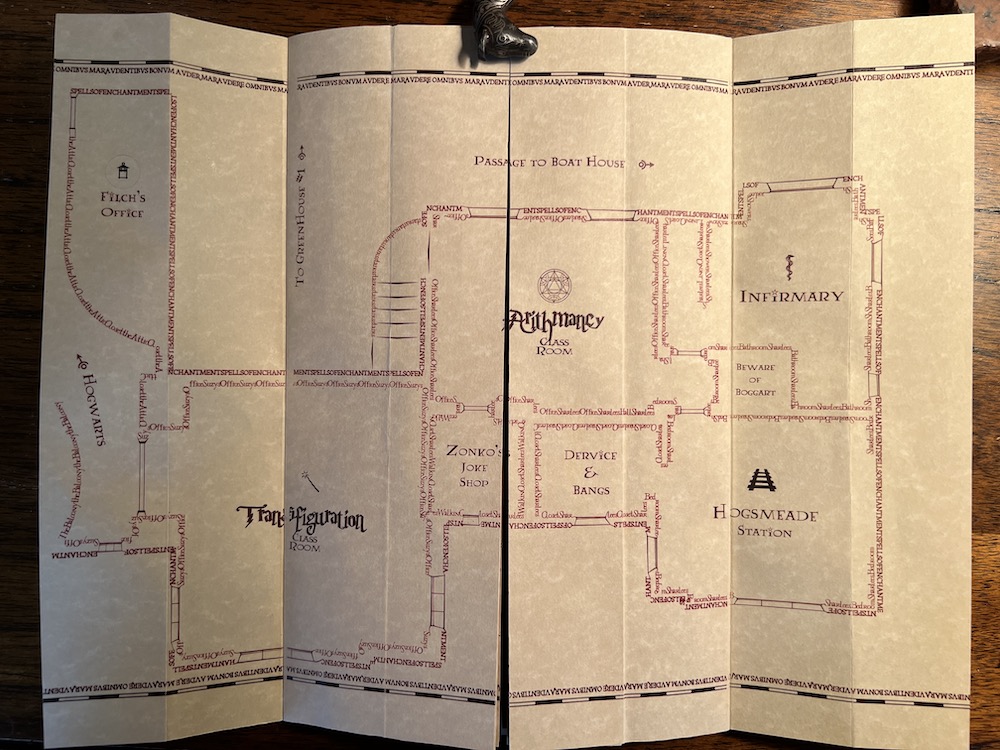
This page continues to fold out into a second double wide page of the floor above, which includes more rooms of Sharlee’s as Hogsmeade places, but also her Mom’s studio, standing in as the Transfiguration classroom and the upstairs closet standing in as Filch’s office.
The map then unfolds normally to reveal another new page, the predominant feature being the Gryffindor common room, but also the Prefect’s bath and the top of the Ravenclaw common room (the master bedroom and hers).
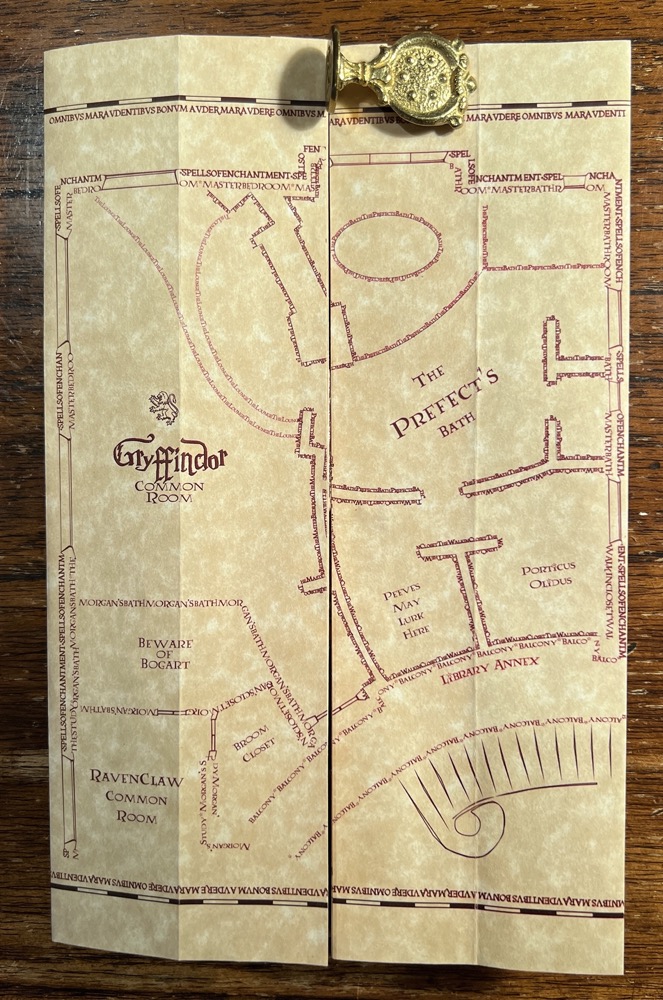
The conceit to the ordering of these pages is that you entered the house from the garden into the lower floor via the boat house (garage), then go upstairs and across to Transfiguration (though there is no way for Muggles to get there). You then continue along the balcony to the master bedroom and then to the girl’s bedroom (Ravenclaw).
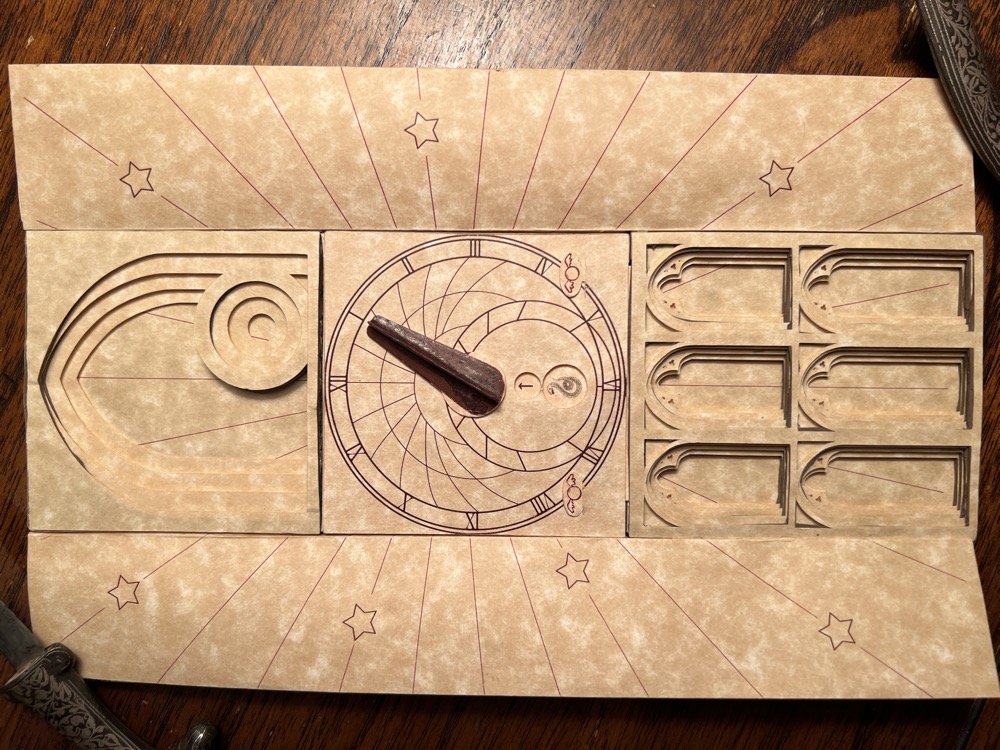
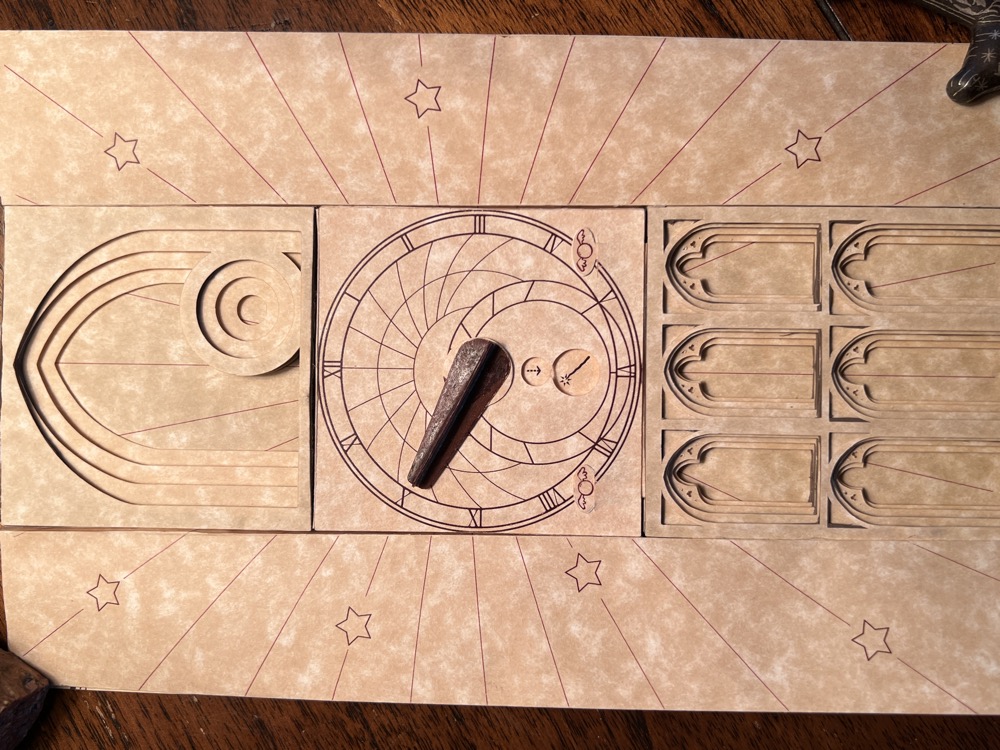
You now go downstairs to the Great room. This is back to the original Marauder’s map, but the star and the little snitch are gone and instead you have a clock icon marking where there is a large clock on the Great room wall.
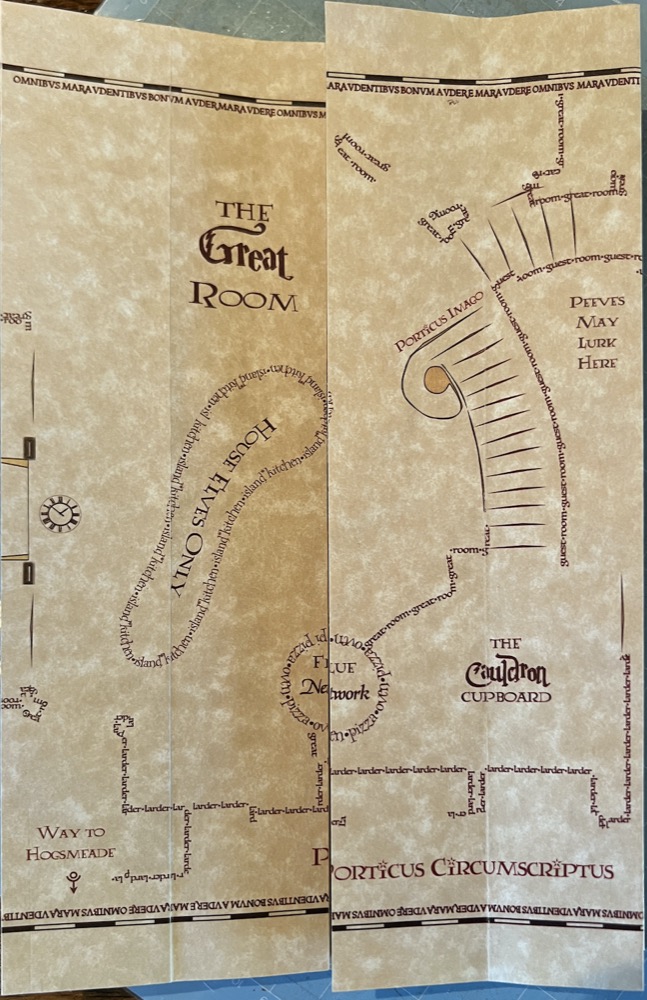
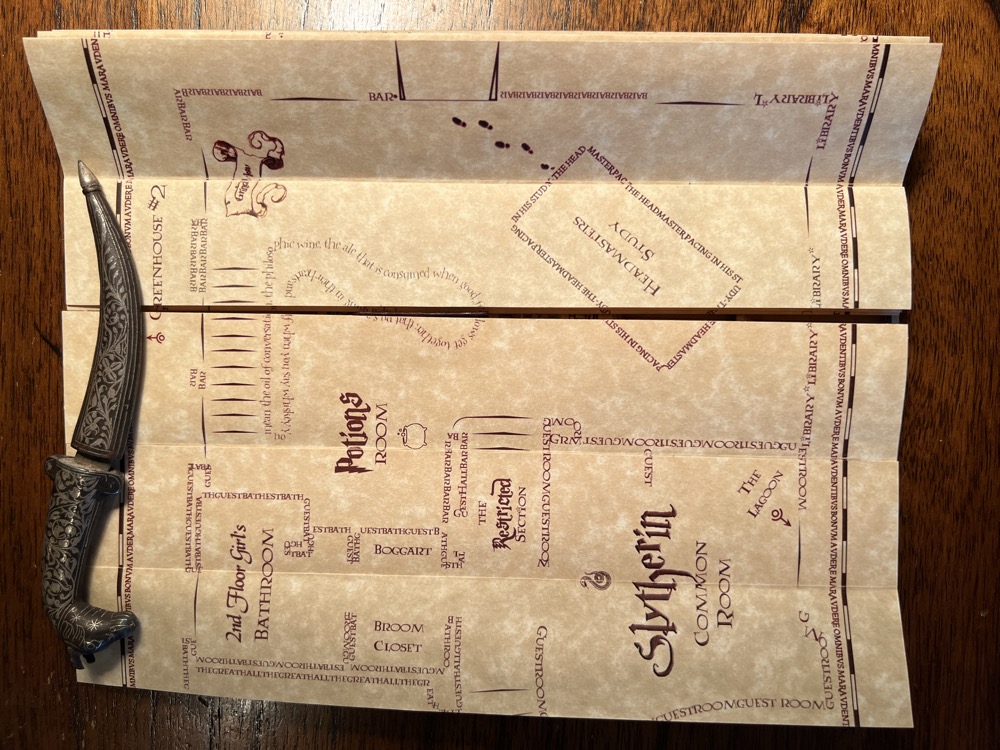
The next page, Potions and the Headmaster’s study, is also from the old Maruder’s map, but instead of it being the final page with the compass rose, it has new foldouts.
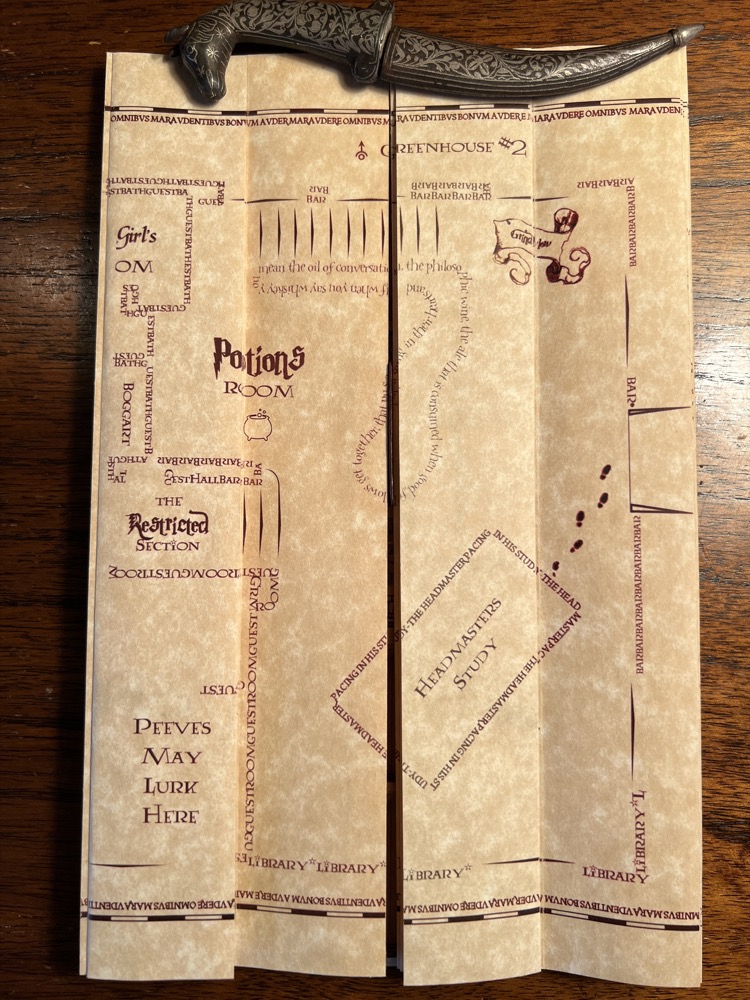
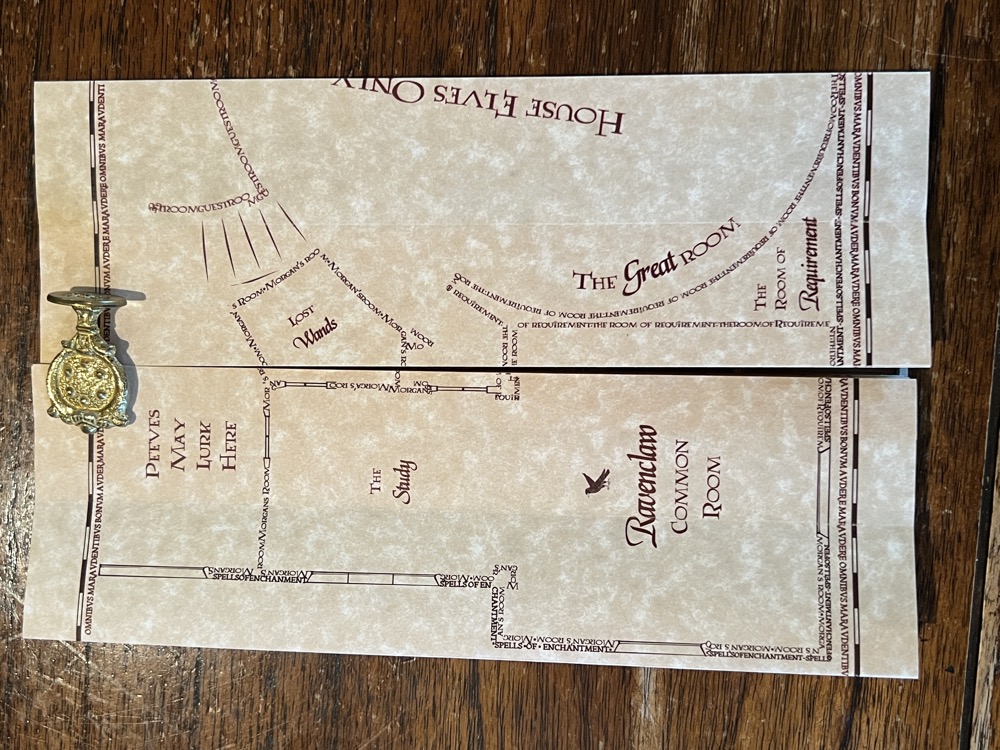
These foldouts turned out to be a bit mysterious, but if you unfold the left side, instead of it being a new room, it opens the map up a bit further so you can see that the room labeled “Peeves may lurk here” is actually the Slytherin common room and the upper room the 2nd floor girl’s bathroom (the guest room and guest bath respectively).
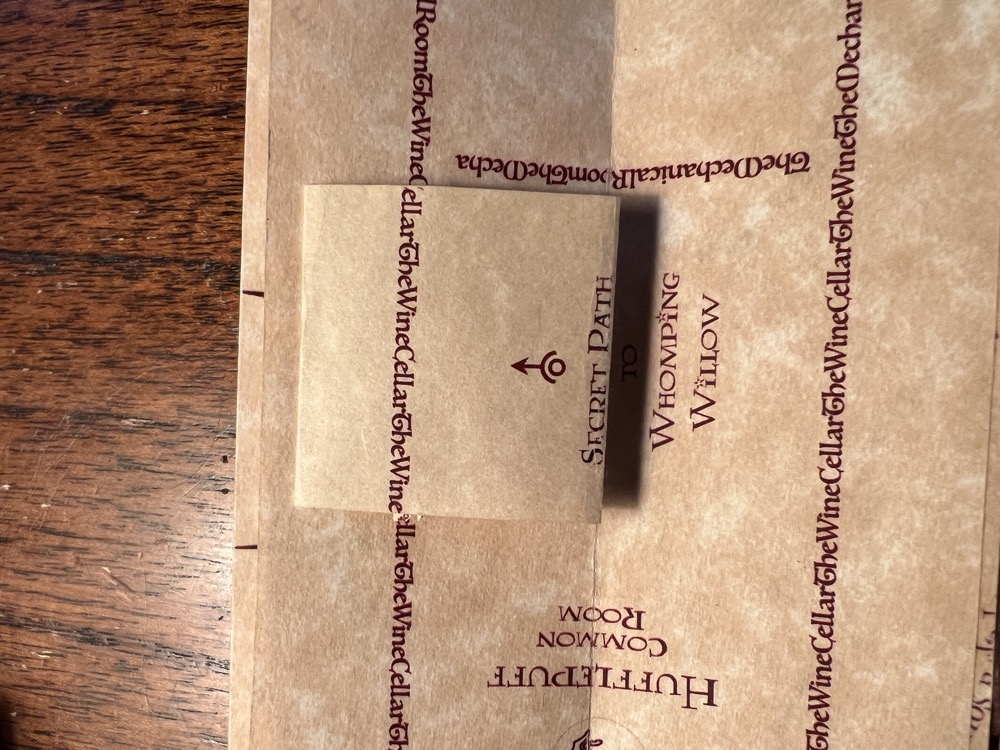
The right fold out reveals what you would see if you were to follow the stairs down: Hufflepuff’s common rooms and the Dungeons (the wine cellar and mechanical room).
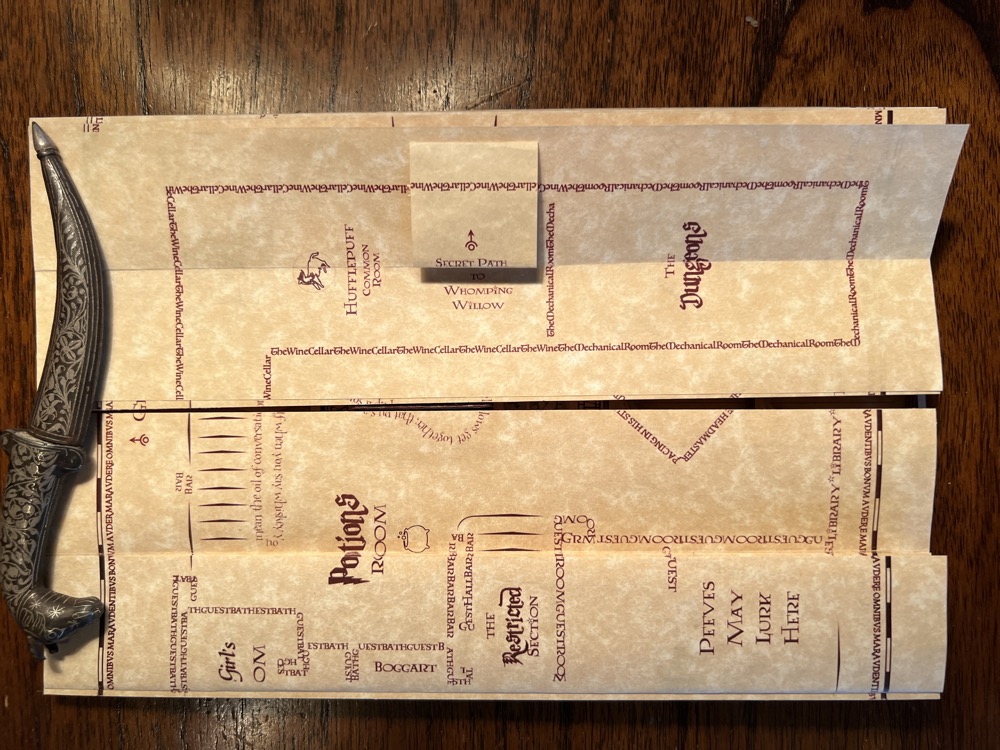
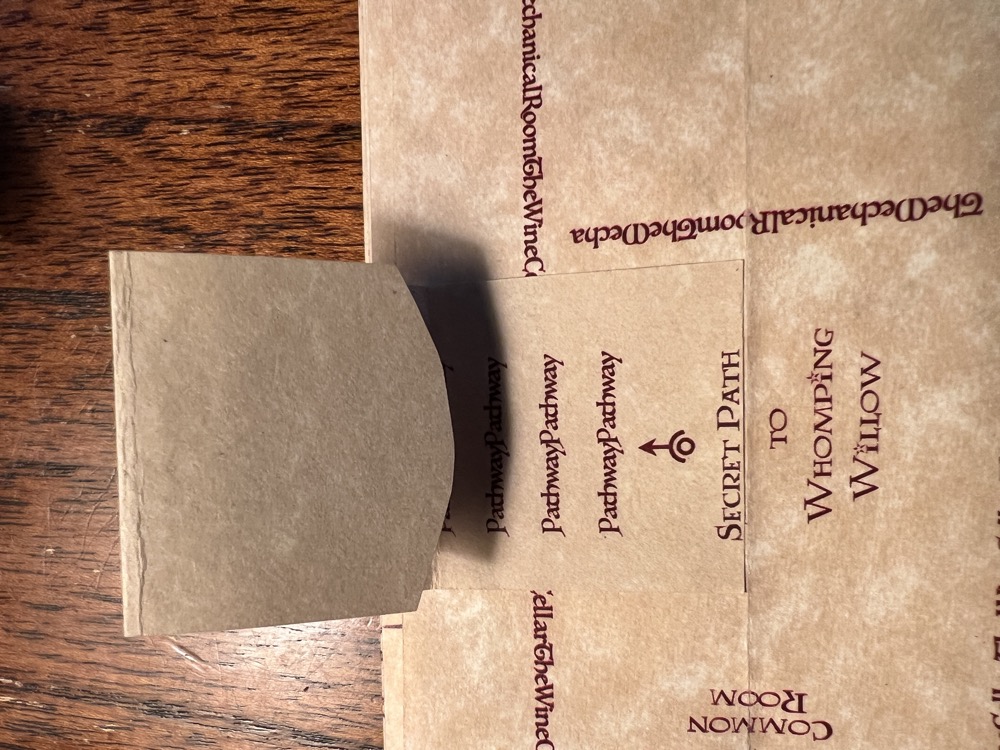
Also on this floor is a very small foldout with a “secret path to Whomping Willow” (the treehouse)…
…which unfolds…
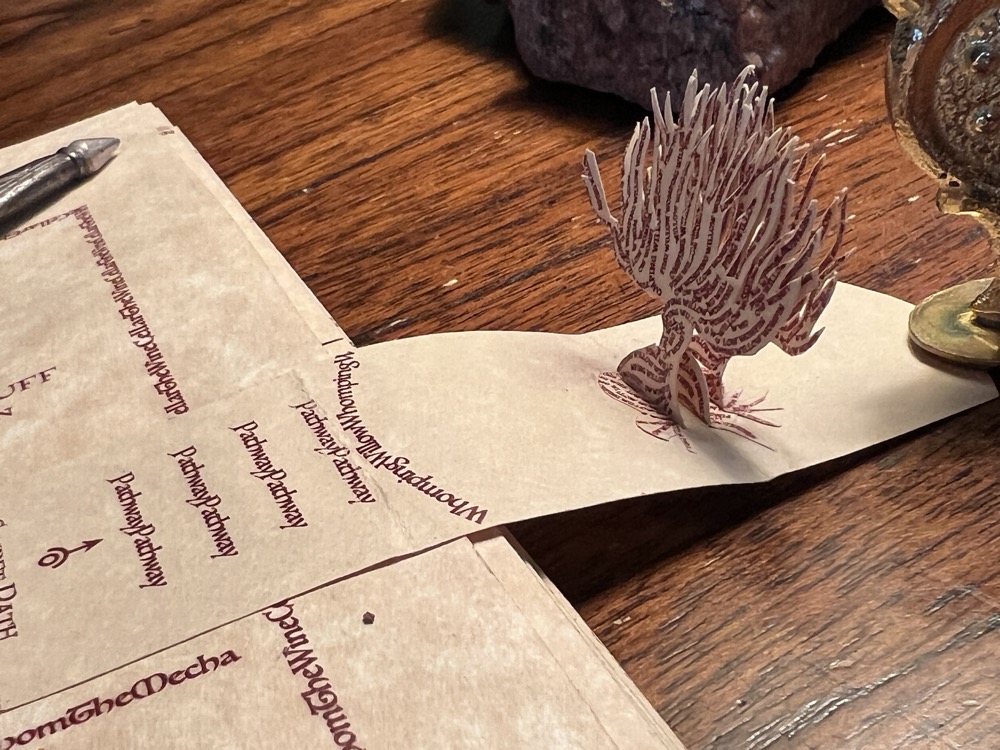
…to reveal a pop-up version of the whomping willow.
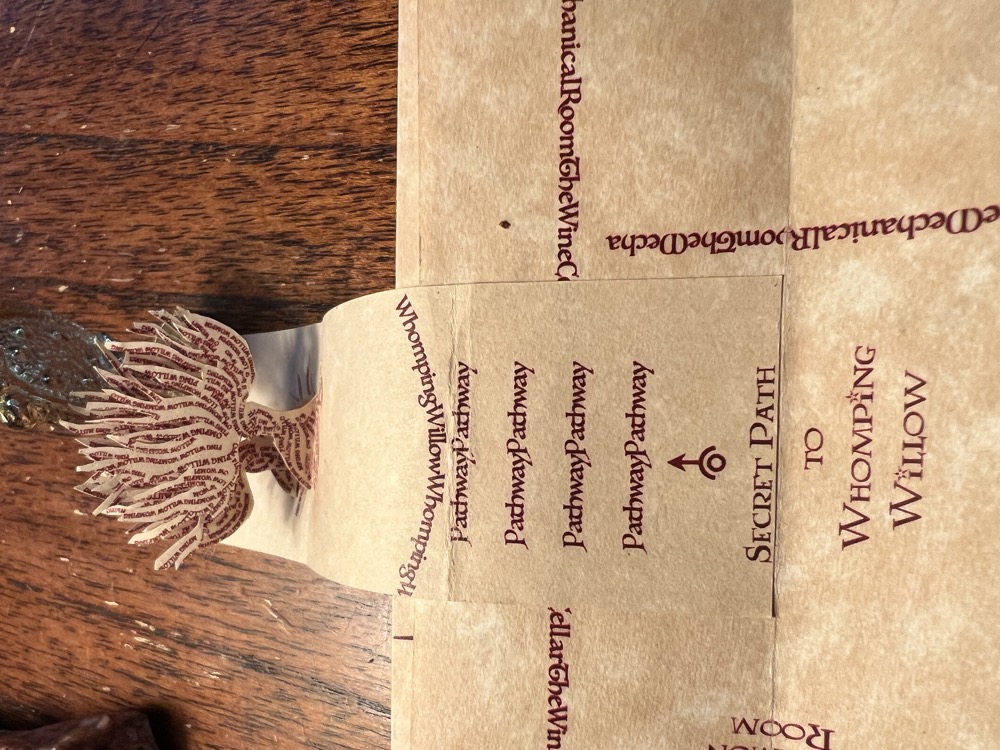
This is just an easter egg, though when she saw it she was quite concerned that she might have to go out to the treehouse as it has been unvisited for quite some time (and was probably full of spiders!)
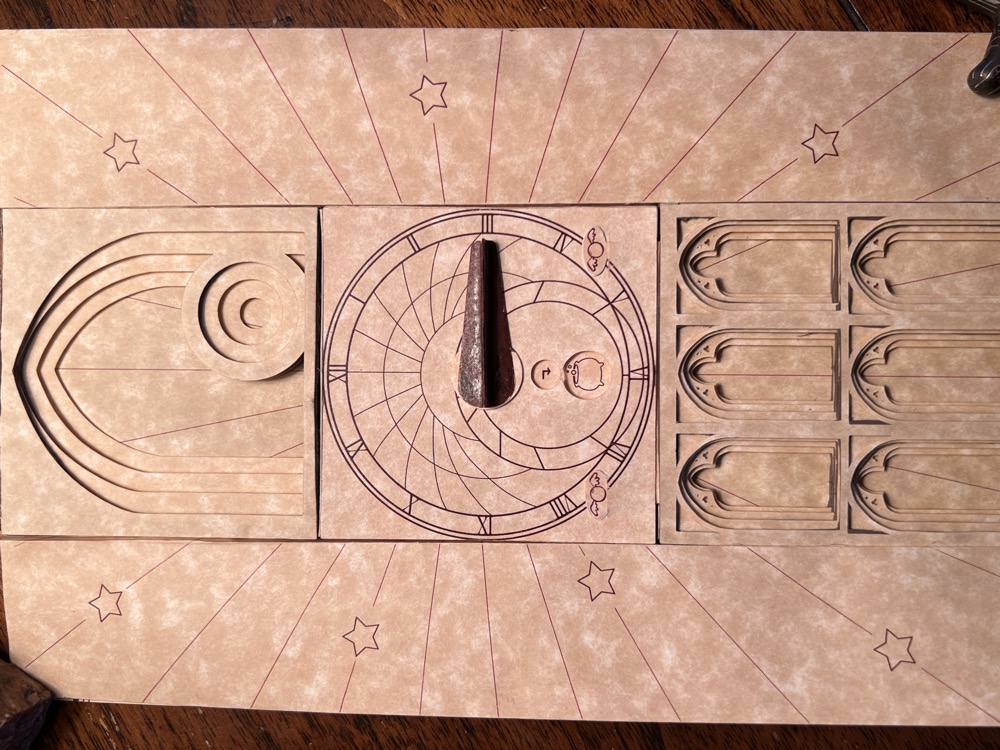
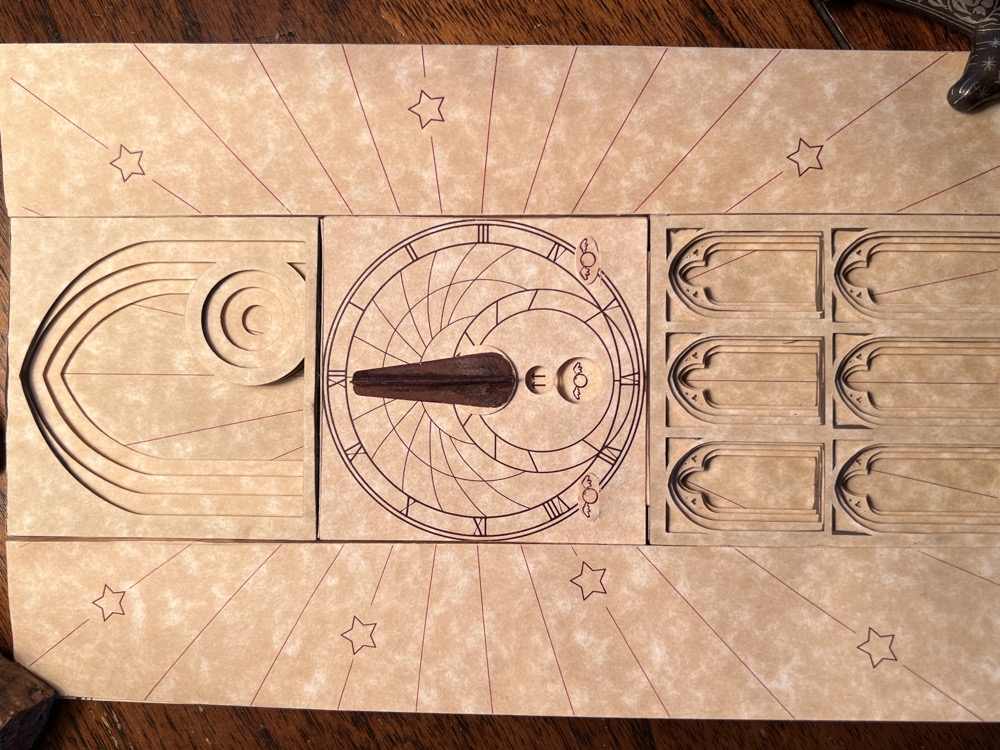
The final fold out of the map reveals a Marauder’s map version of the Hogwart’s Clock tower.
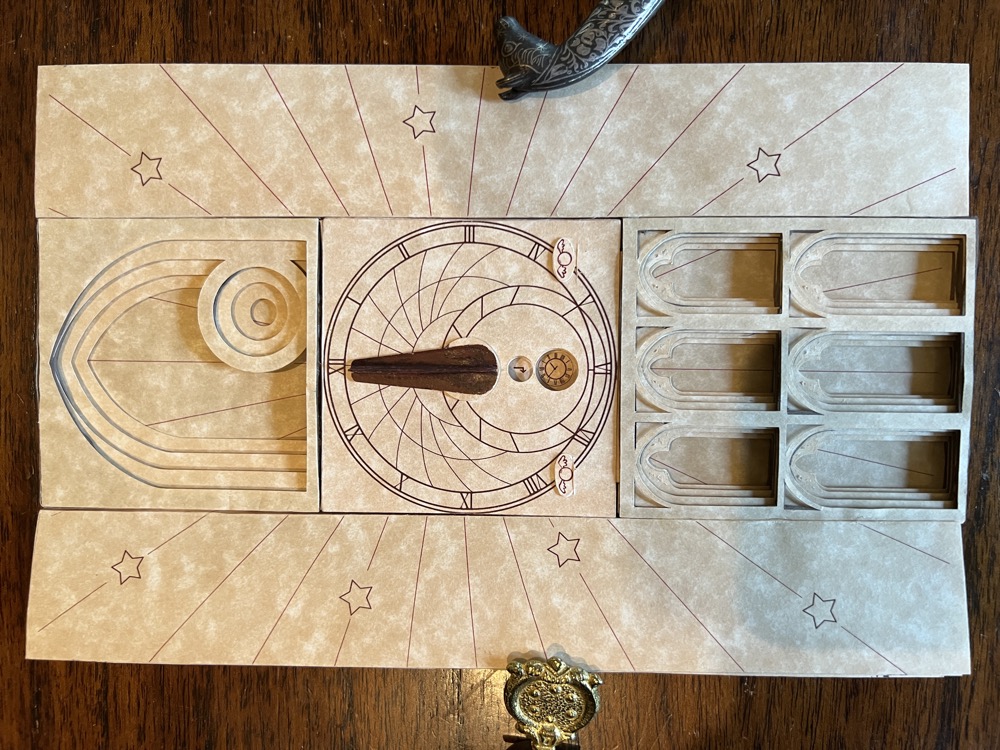
Solving the map
The first challenge was interpretting what the clock was for, and how to even start. This was further complicated by old-school analog clocks not being something she uses in her day to day life, and having roman numerals on the clock didn’t help!
The key is to noodle out that the clock icon that is at the bottom of the map is one she has seen before. Can you find it on the map pages above?
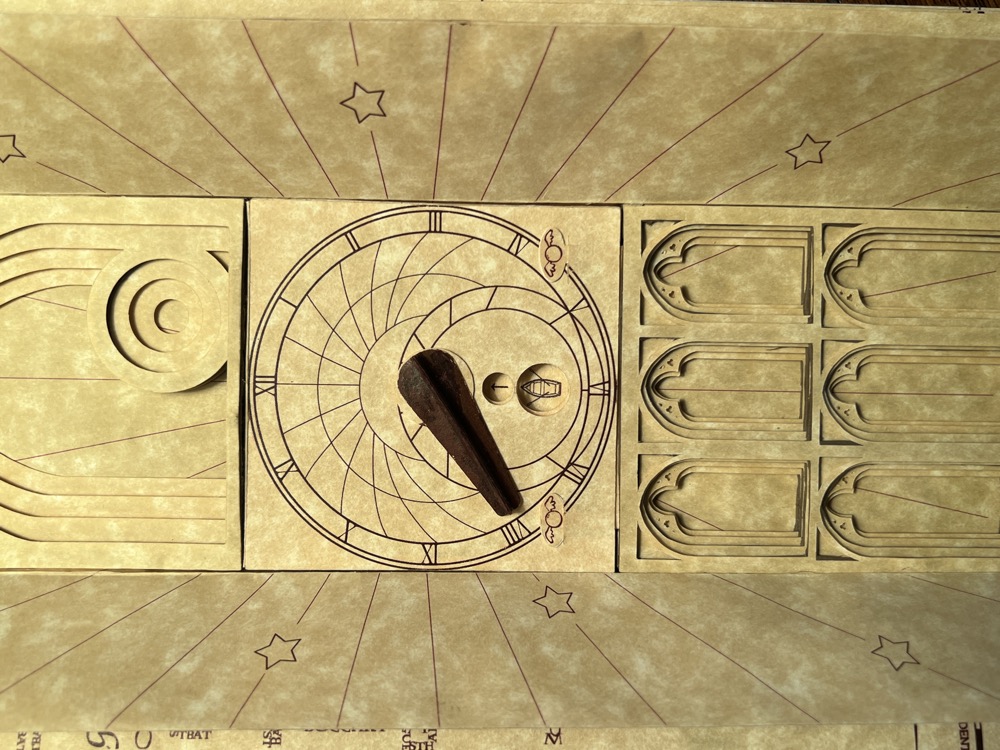
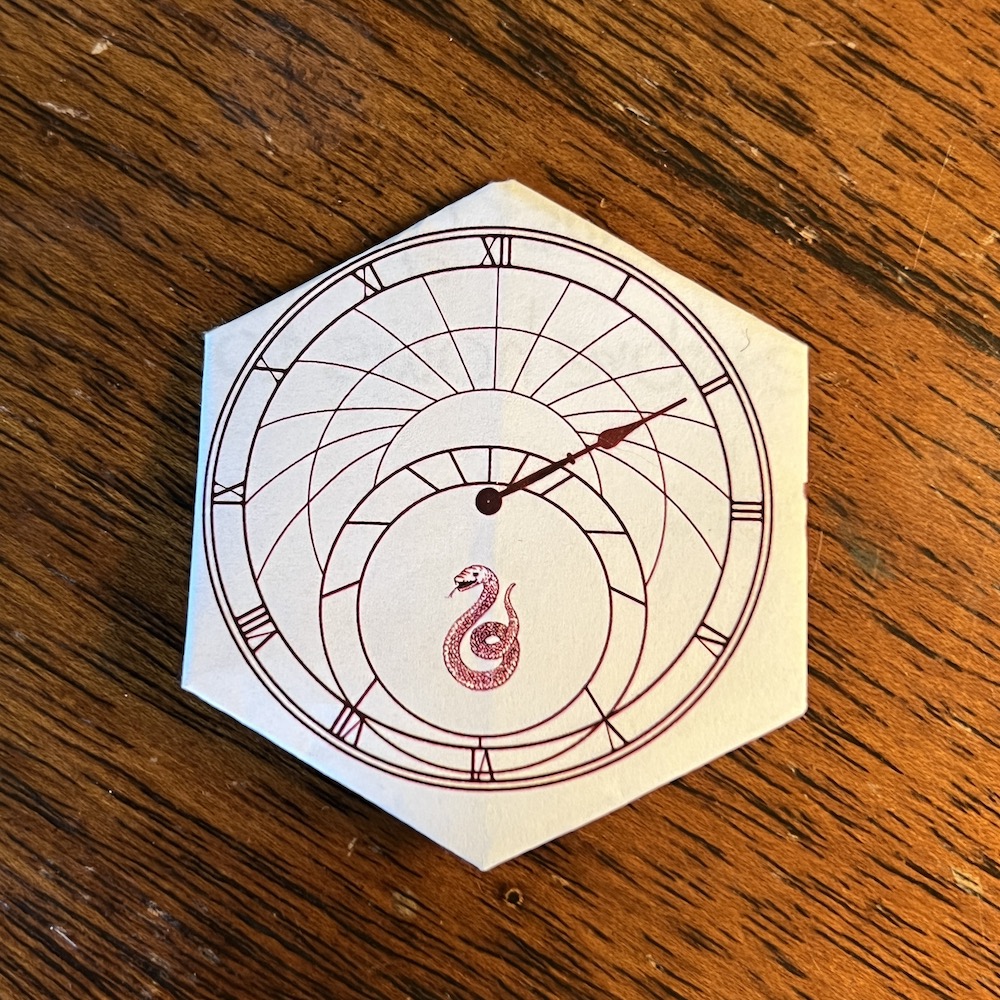
The second challenge was deducing what the smaller arrow icon above the clock icon meant. She saw that it was an arrow but got fooled by the smaller part of the arrow pointing to the left - she went way too far and went over to Sharlee’s side. I pointed out that the bigger part of the arrow was the top, and the smaller part was to the left. This was one of those times where she was in a bit of a rush and so kept missing it. The secret was to look under the copper trash can, just to the left under the clock.

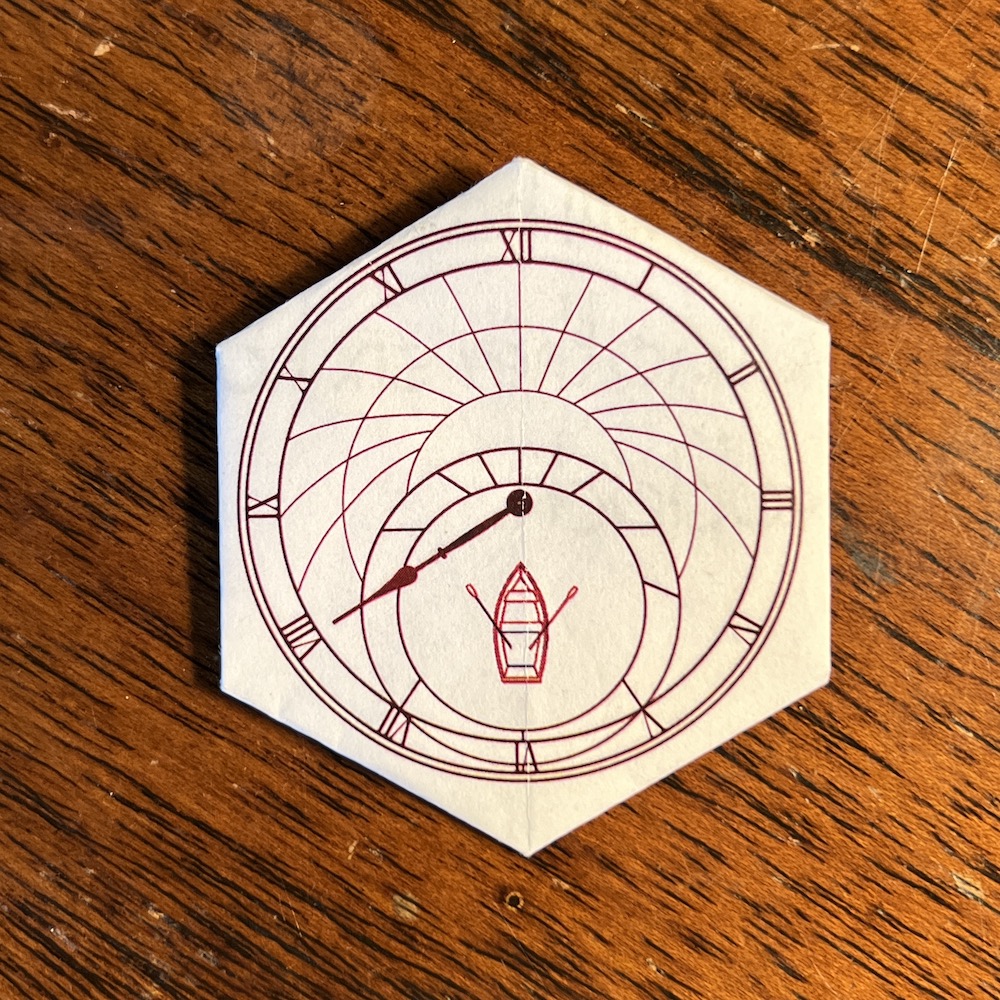
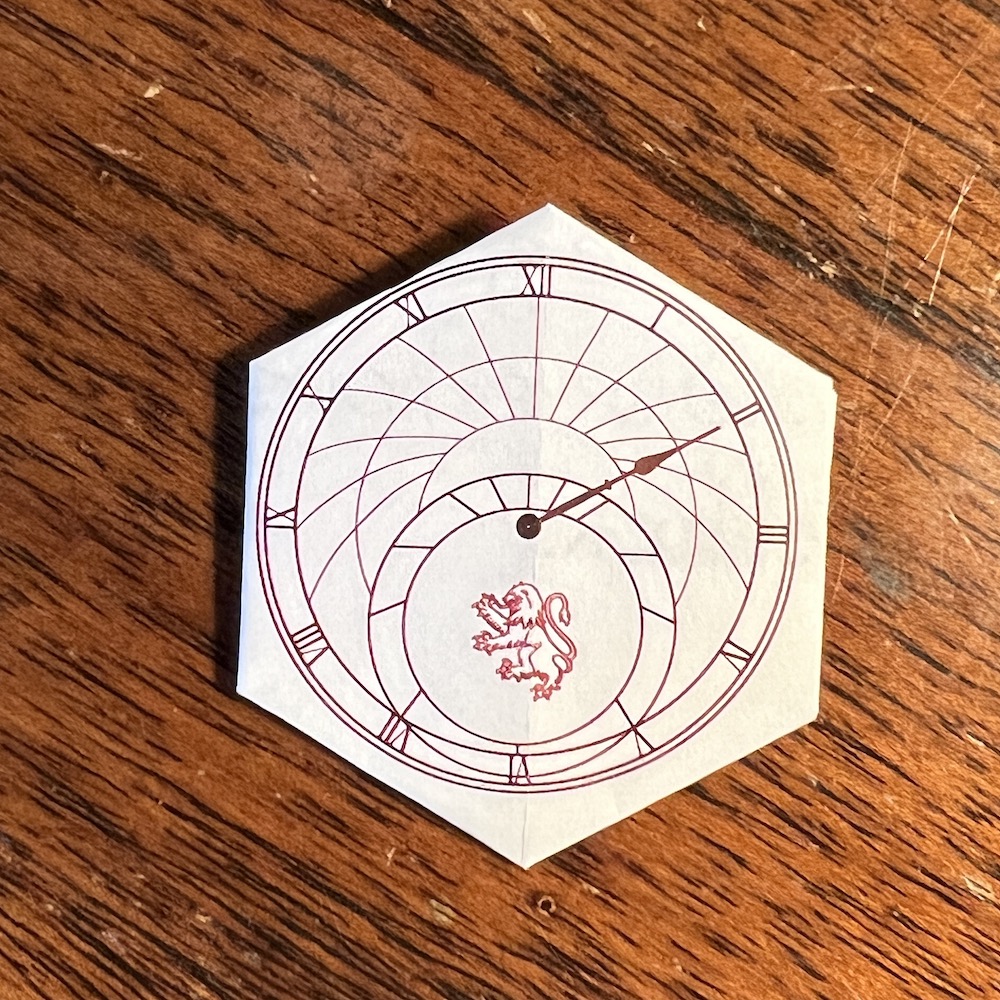
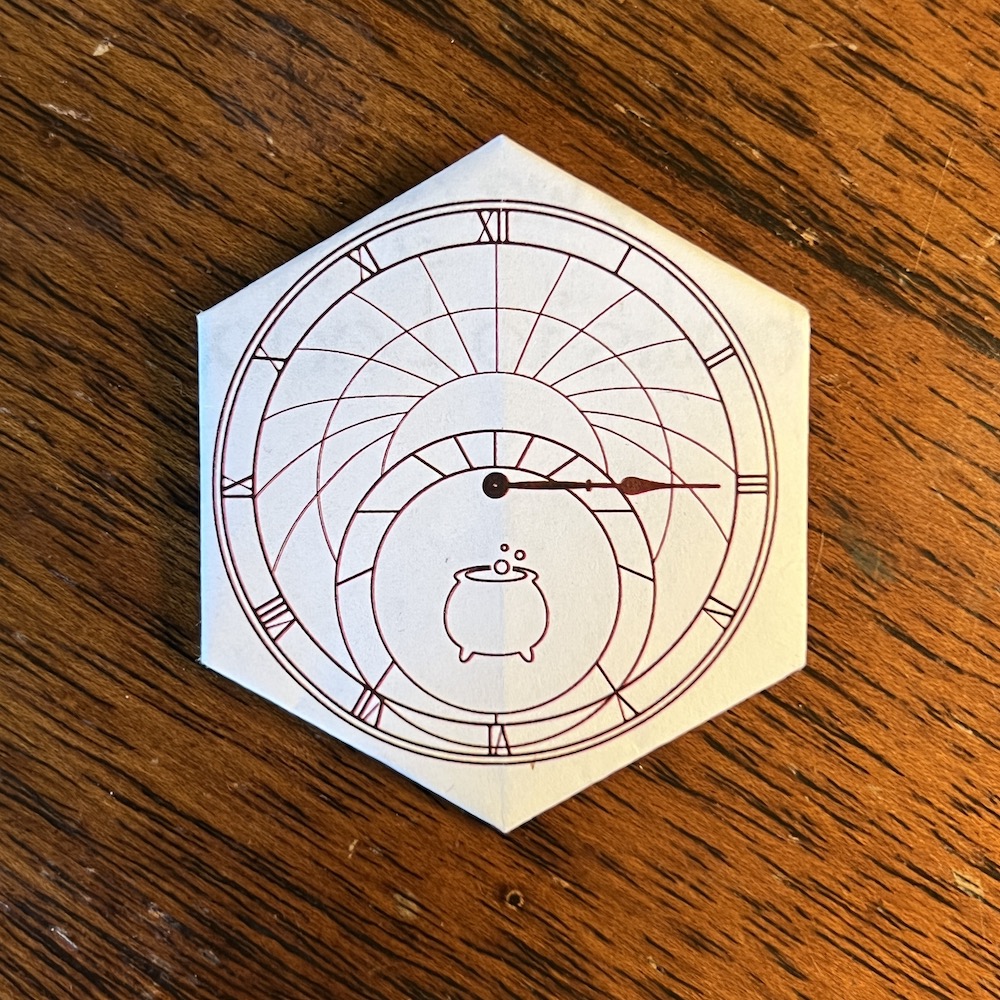
Under the copper trashcan was a small origami clock with a picture of the clock as shown in the Marauder’s map.
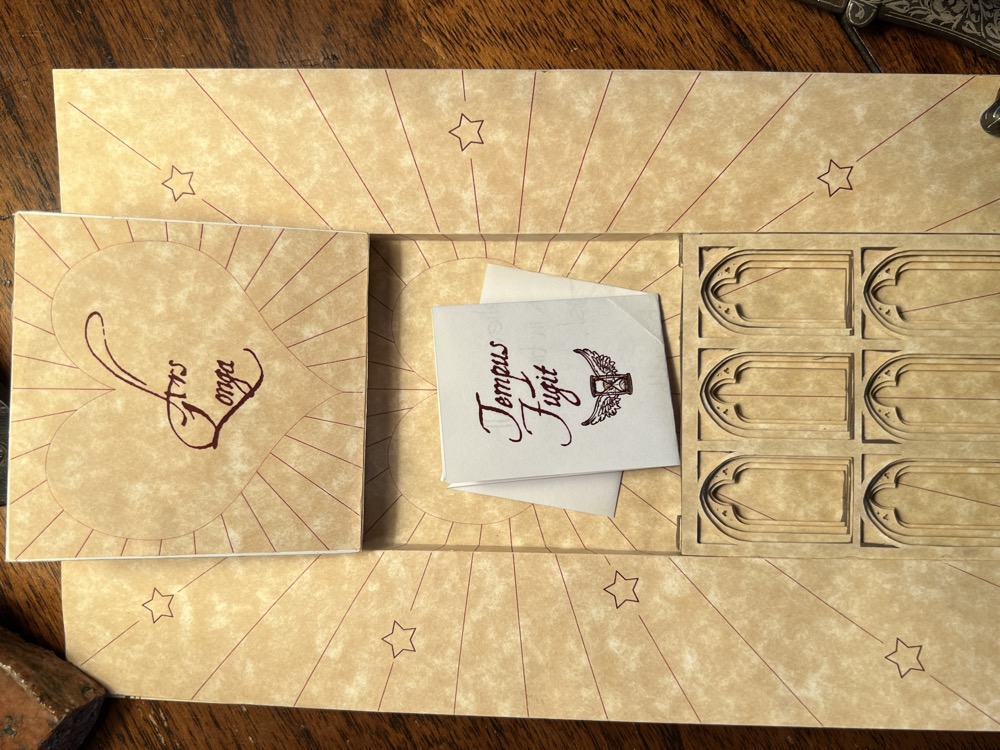
Unfolding the clock reveals a note from Hermione…

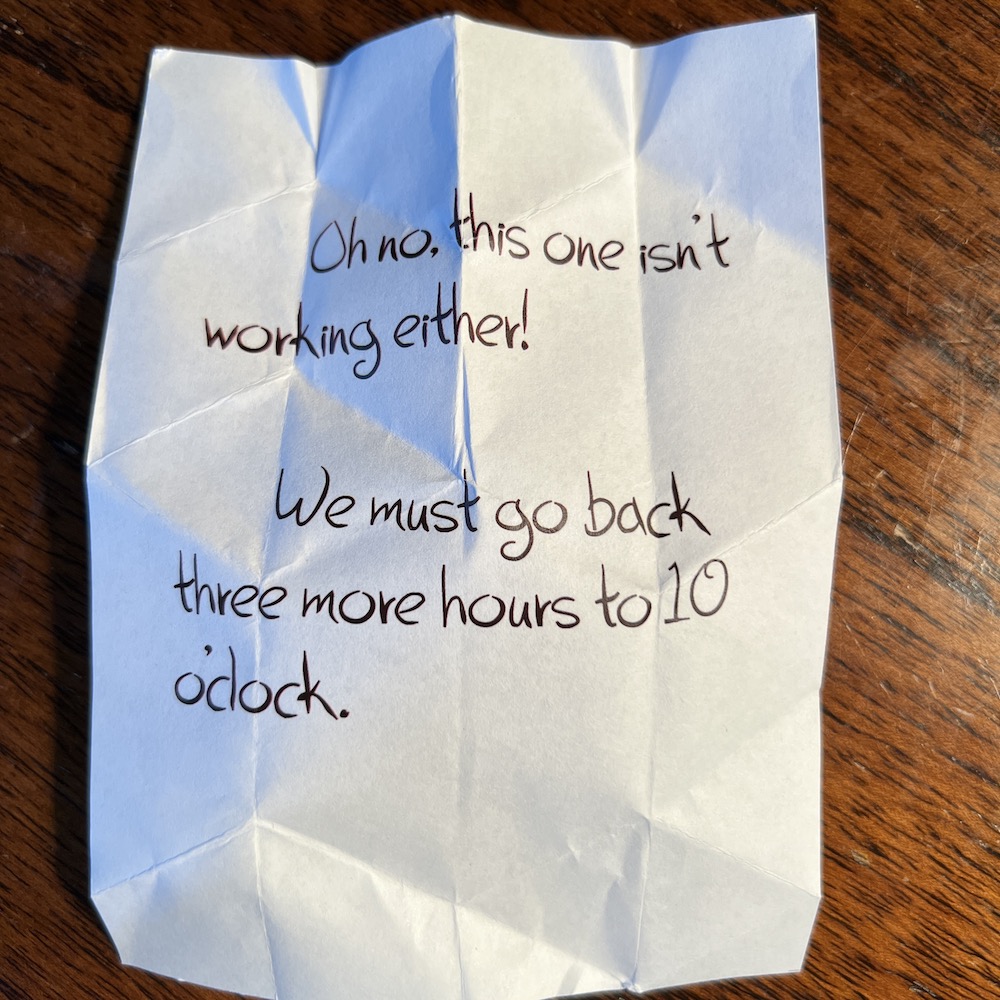
The third challenge is to figure out that you need to go back in time four hours to 8 o’clock. Doing so reveals new icons, a boat and an arrow pointing up.
An unintentional challenge came up here. The boat icon is on the left side of the garage, which is where there was space to put the label and the icon, but the clue was above a clock in the top right section of the map. It took a bit but after some strong thinking and searching she…had me look at the top of the clock as there were no doubt spiders…

Behind the top most cog on the clock was the second clue…
…which unfolded to the second note…

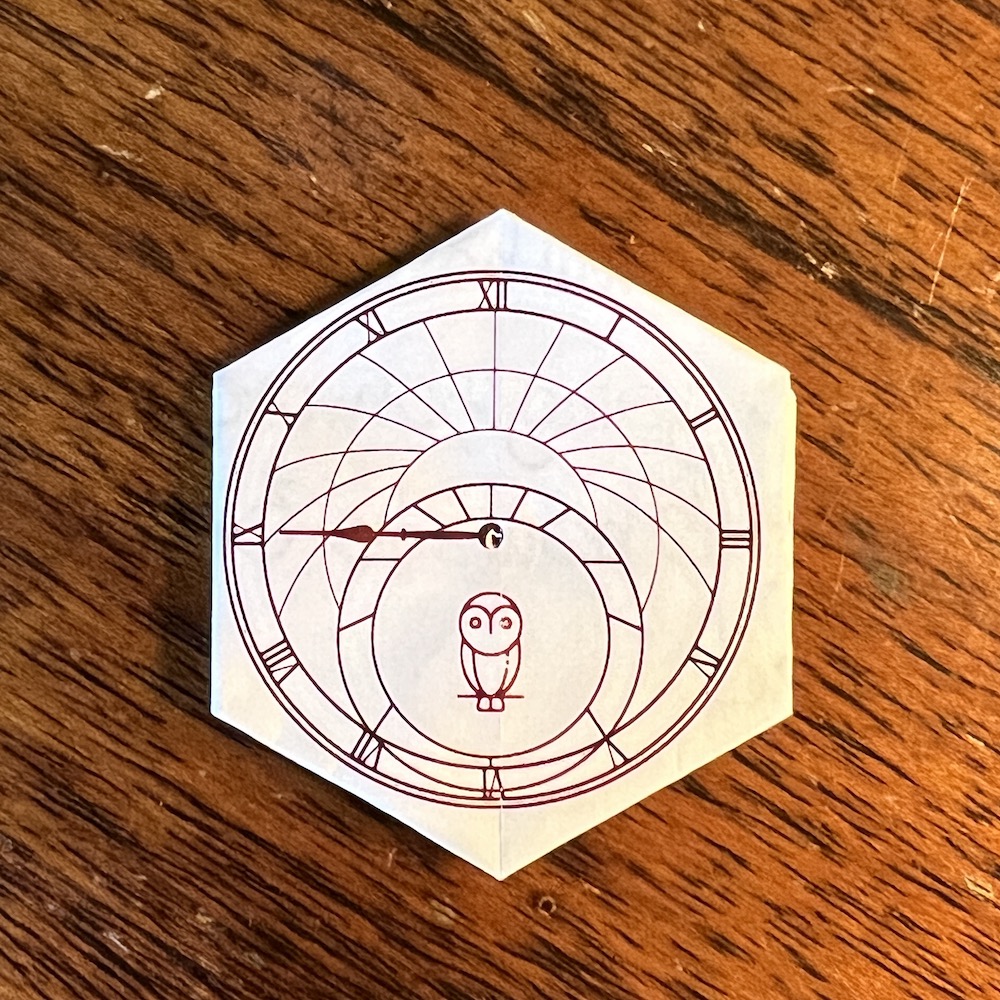
Moving up the hour hand to 2 o’clock showed…

Searching in the master bedroom (which is to say, the Gryffindor common room), finds a melting clock…

Underneath was the third clue…
…which unfolded to the third note…
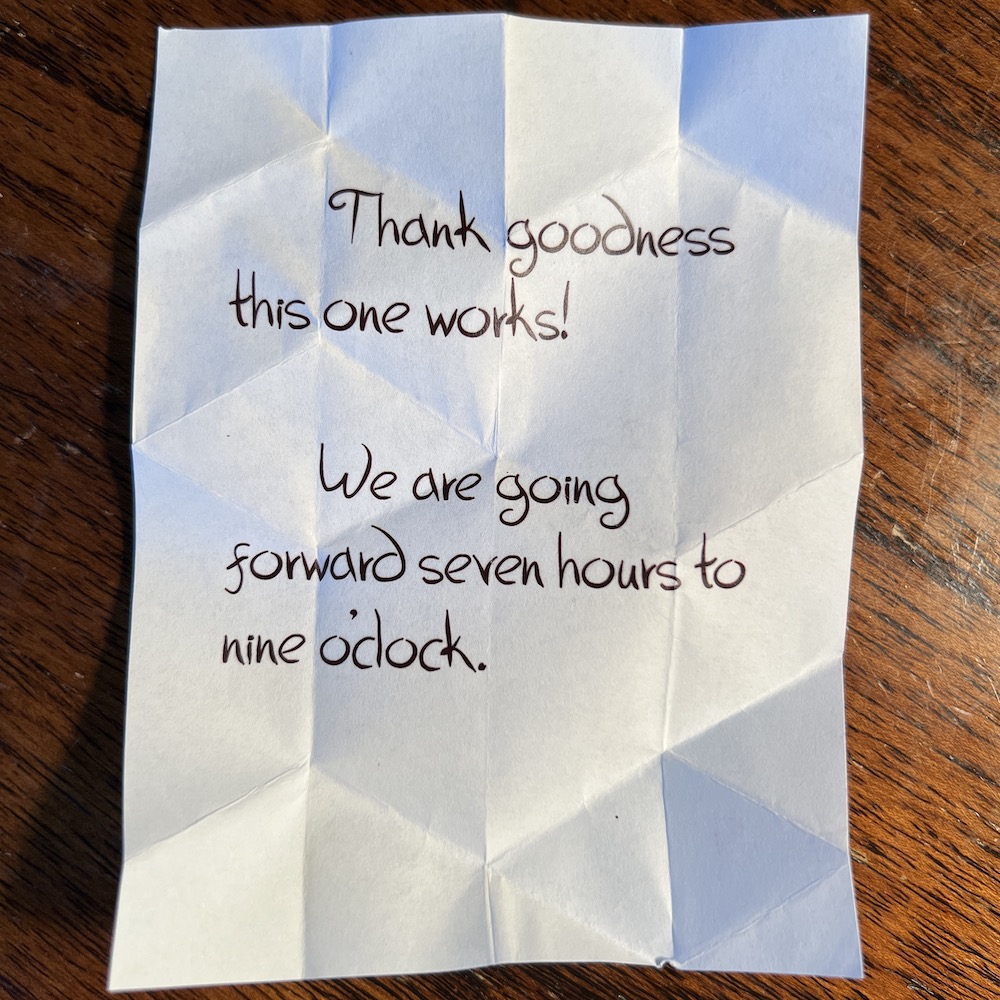
Moving the hour hand forward to nine o’clock showed…
It took a bit to re-find the owlery icon - the chicken coop. She had already been out to visit the chickens and noted the clock. I told her that it came from the tree house and I decided it should be out of the rain, even if it wasn’t working.

She said I’d have to reach behind the clock if it was there as there were-no doubt-spiders! Pinned on the opposite side of the clock was…
…which unfolded to the fourth note…
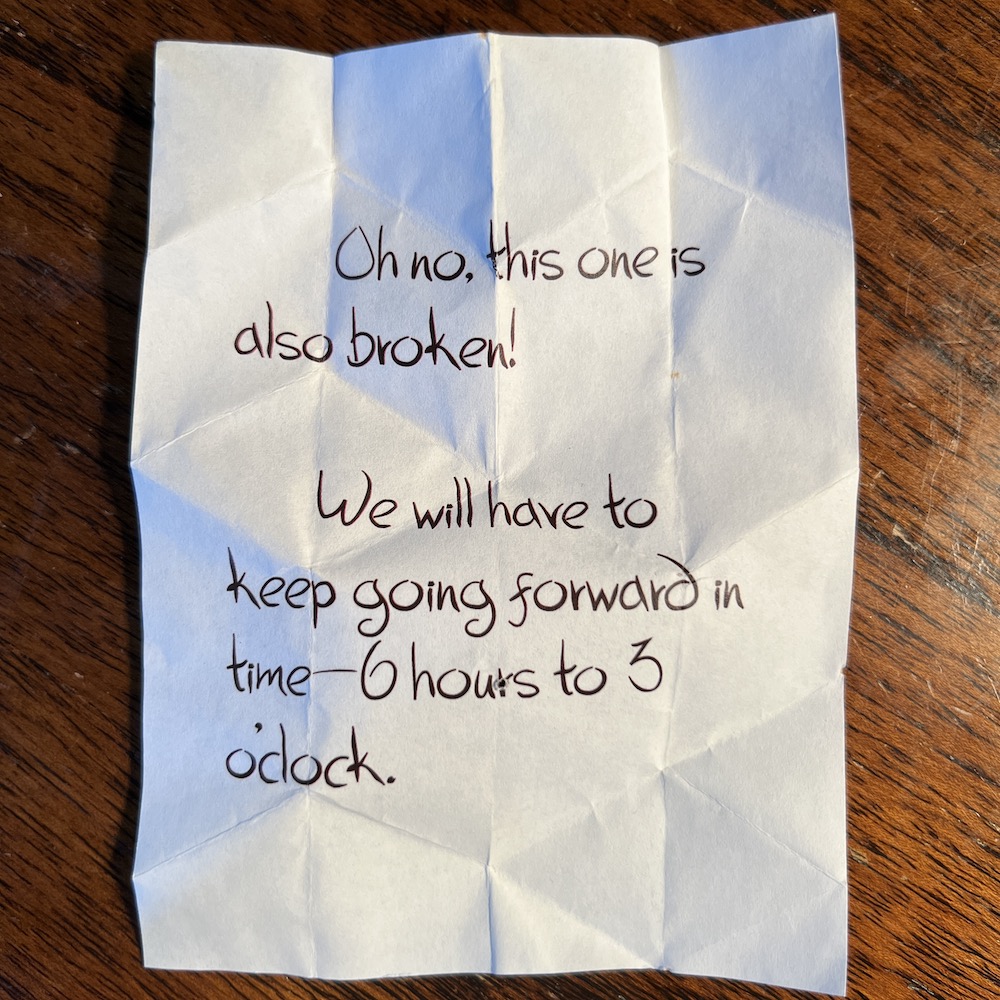
Moving the hour hand forward to three o’clock showed…
The potions room is old hat now…

This was pretty straigthforward as she had gotten the hang of these “mostly down and to the left/right” icons now. Behind the coffee maker was…
…which unfolded to the fifth note…
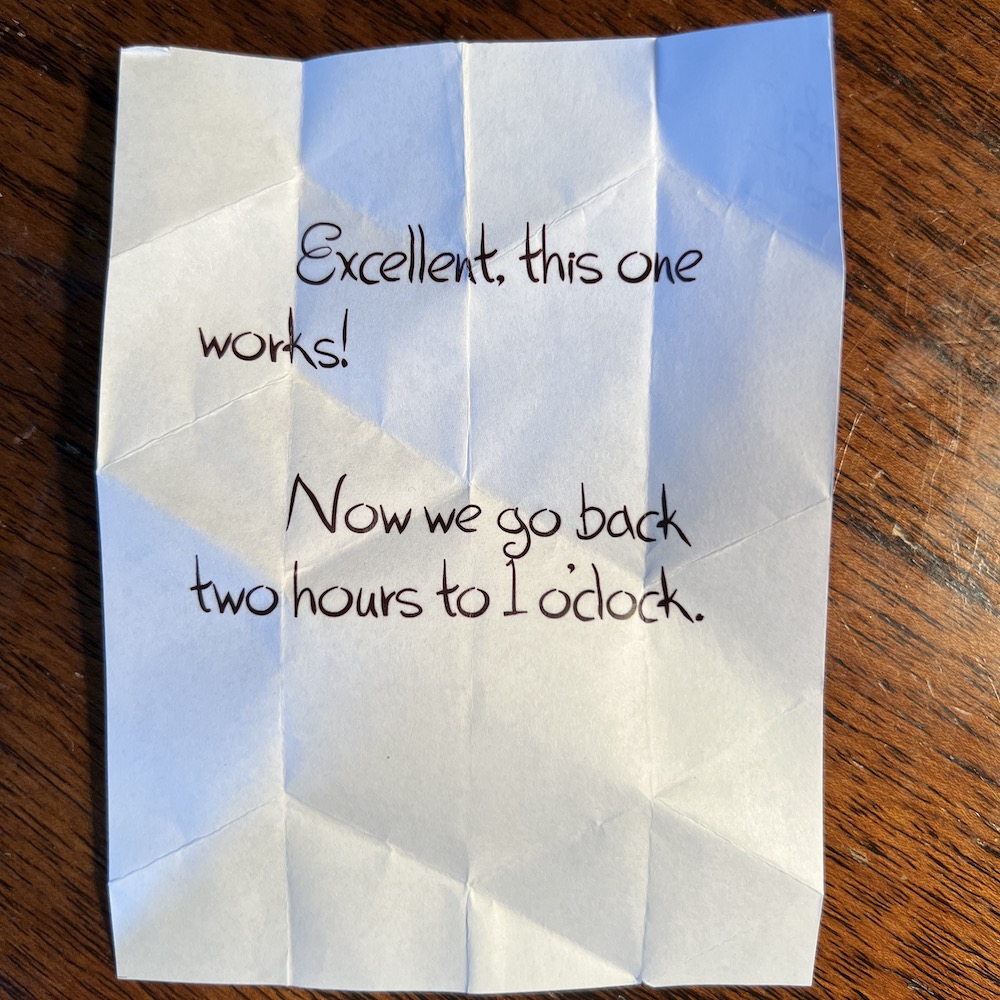
Moving the hour hand back to one o’clock showed…
Again, it took a bit to find the room associated with Slytherin (the guest room) and a very, very long time to think to open the close to find…

The clue was sitting directly on the clock, so that one was easy at least.
…which unfolded to the sixth note…
Moving the hour hand back to ten o’clock showed…
This one went relatively quickly as things were starting to become familar. Up in Suzy’s studio is a dragon clock…
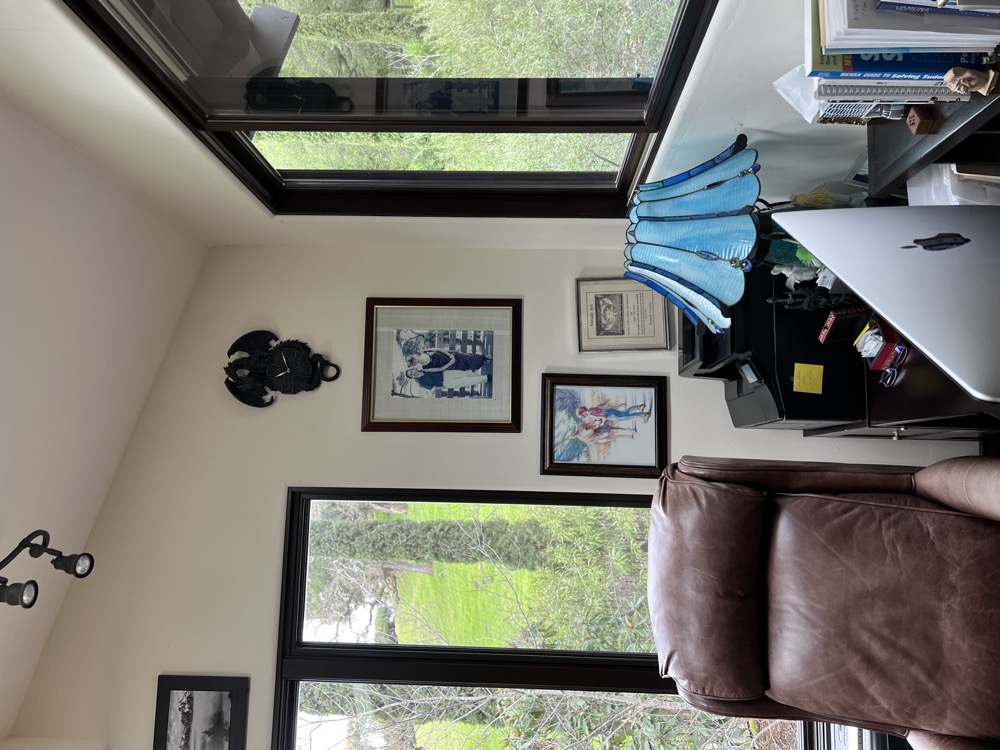
The clue was sitting below, on the cabinet behind the printer.

…which unfolded to the seventh note…
Setting the clock forward to midnight now shows a snitch icon - and a new puzzle…
There are no snitches anywhere on the other pages of the map! Also, what is the deal with not one, but two arrows pointing up!. It took a hot minute but she finally was willing to lift up the snitches, which then kept going to reveal…
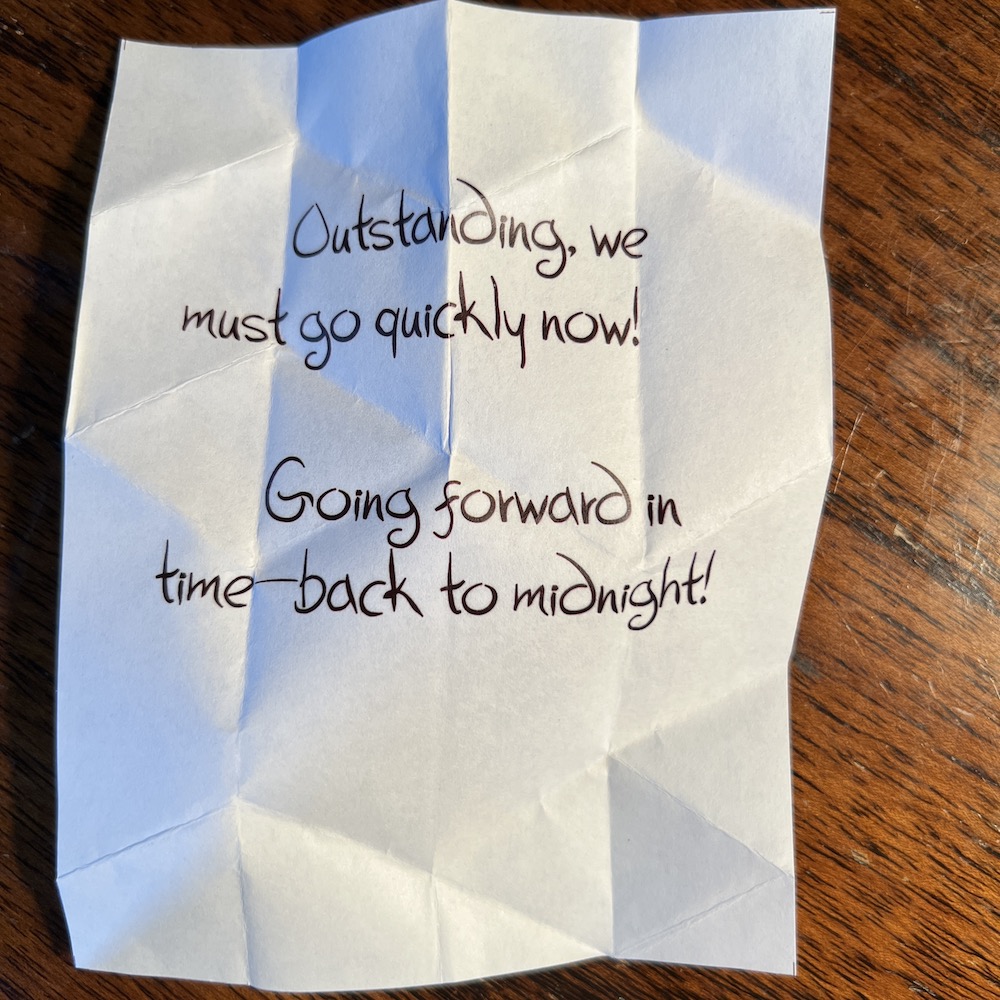
Opening this note shows…
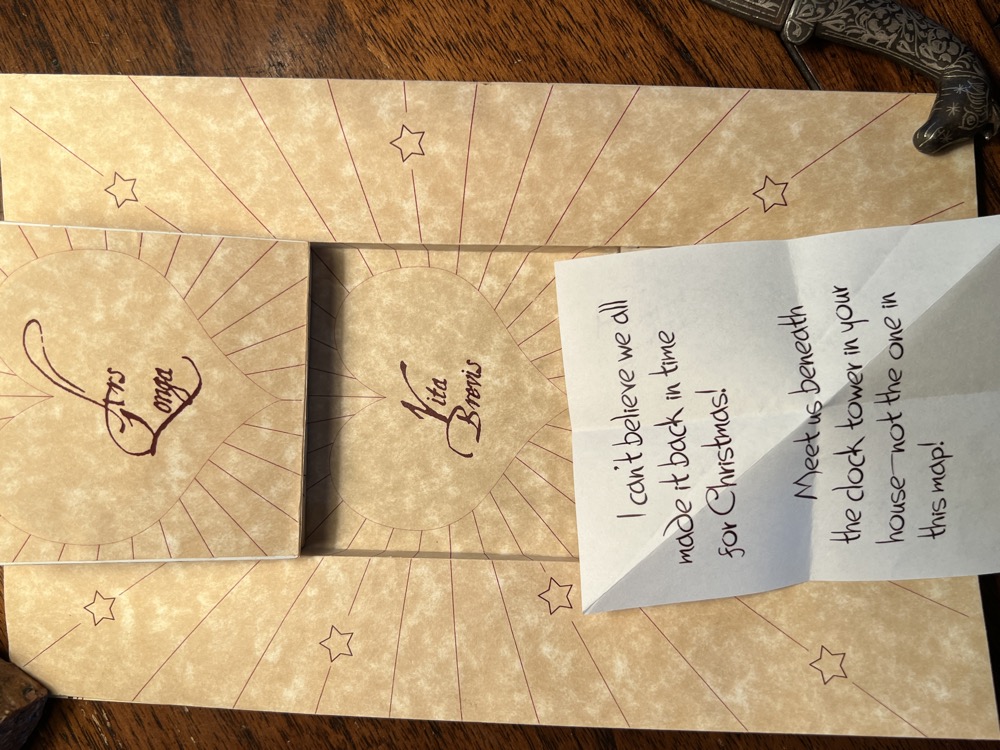
(In case it is hard to read the image, the note reads…)
made it back in time
for Christmas!
Meet us beneath
the clock tower in your
house–not the one in
this map
And now the final challenge - where and what is the “clock tower in your house”. Again, I’m always surprised at how what I think will be the easy puzzle’s are difficult and vice versa. She finally thought of the hogwarts model I have (and have used in other hunts) at the top of my coke machine…
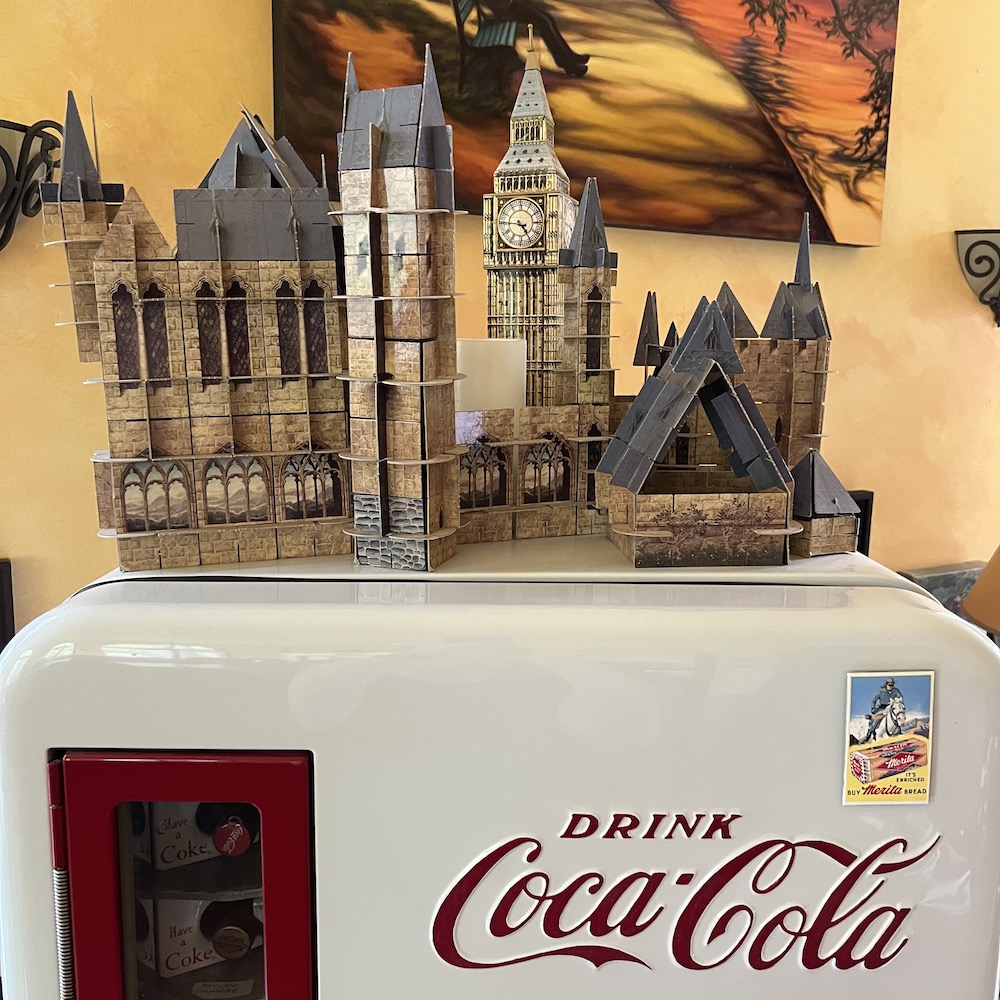
After some noodling, she lifted up the Big Ben addition to find…

And inside was a USB drive with the audio book of my narration of The Hobbit by JRR Tolkien.
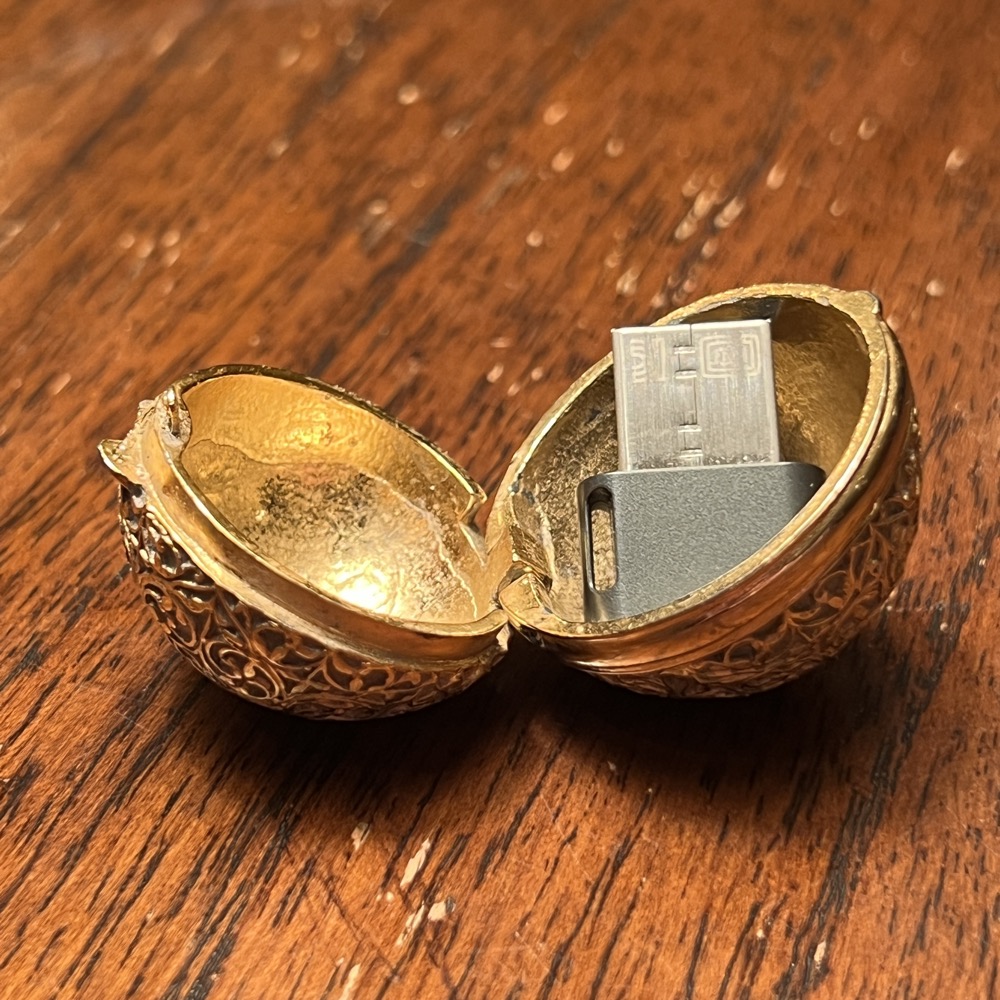
She had asked if I would be willing to ever do this some time ago and had forgotten so it was a great ending surprise.
Merry Christmas!
Go behind the scenes to see the mechanism for the combination clock and the making of the expanded marauder's map.